Building Materials
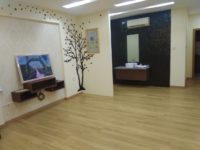
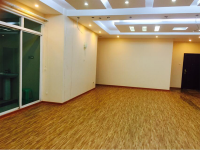
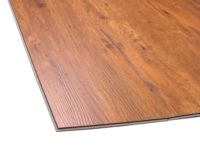
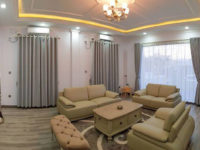
TouchWood Luxury Vinyl Floor
Wood Design Vinyl Plank
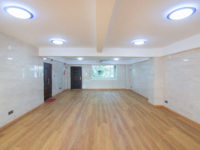
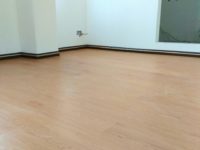
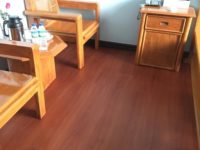
သစ်မာတွေရဲ့ အသွင်အပြင် (wood grain & texture) အတိုင်းမြင်ရသည့် မျက်နှာပြင် ၊ သစ်မာခင်းထားသကဲ့သို့ အပူအအေးမျှတမှု ၊ သဘာဝပတ်ဝန်းကျင်တွေ ထိခိုက်စေတဲ့ ပါကေးကဲ့သို့သော သစ်မာများအား အစားထိုးနိုင်တဲ့ ကြမ်းခင်း ၊ ရေစိုခံနိုင်တဲ့ အတွက် သမားရိုးကျ (Laminate floor) တွေကို အစားထိုးနိုင်တဲ့ ကြမ်းခင်းသစ် ဖြစ်တဲ့ (Luxury floor) နဲ့ ကျွှန်တော်တို့ မိတ်ဆက်ပေးလိုက်ပါပြီ။
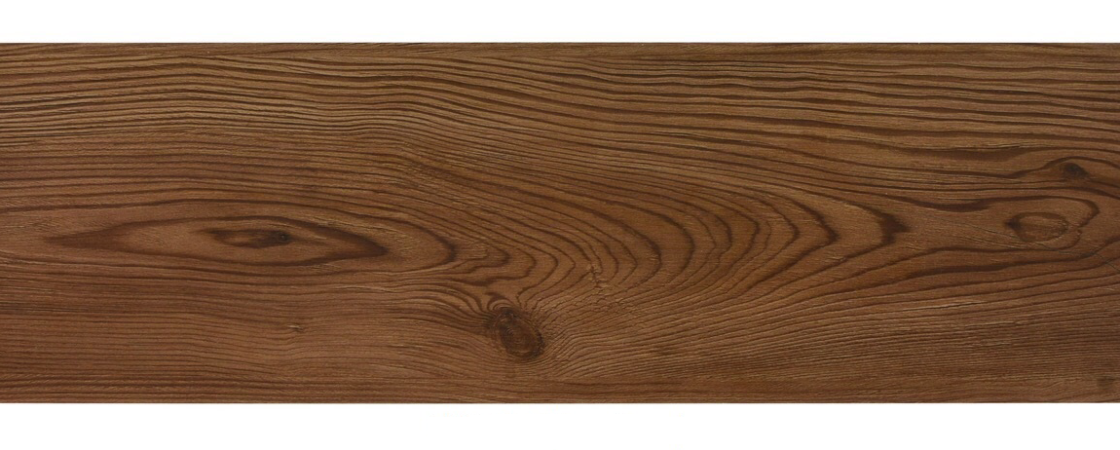

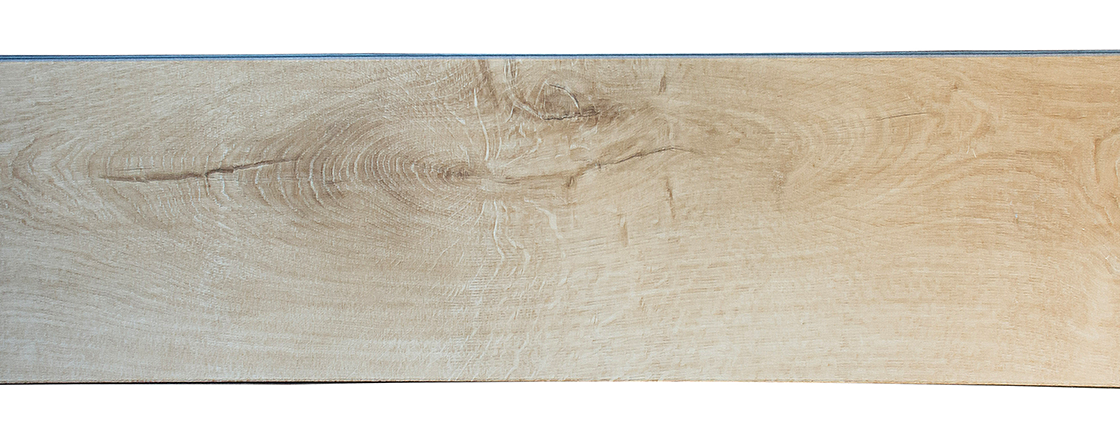

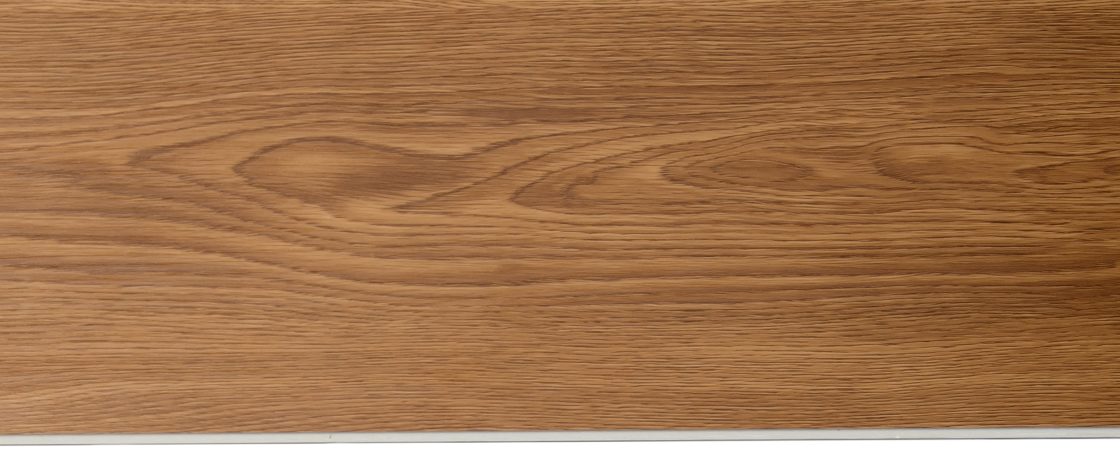


TWS-29105-4
Elegant Teak
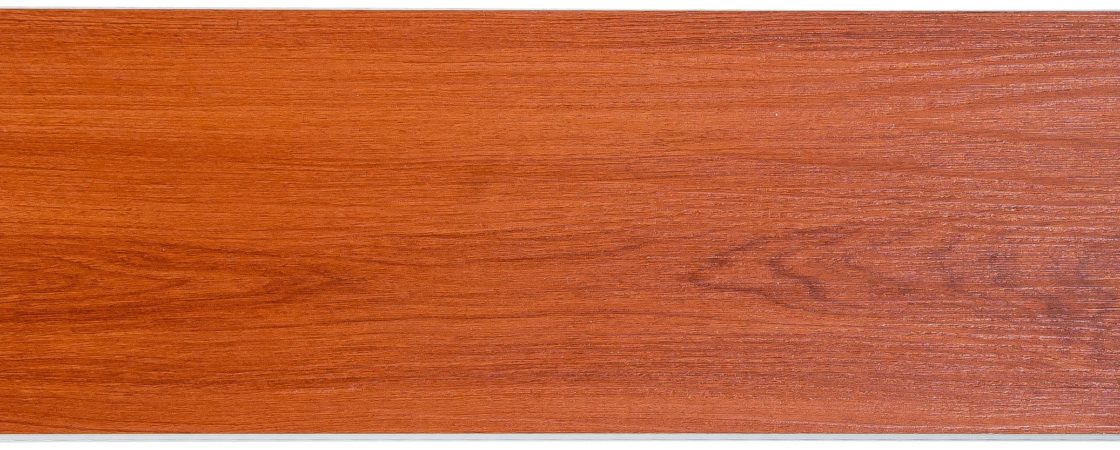
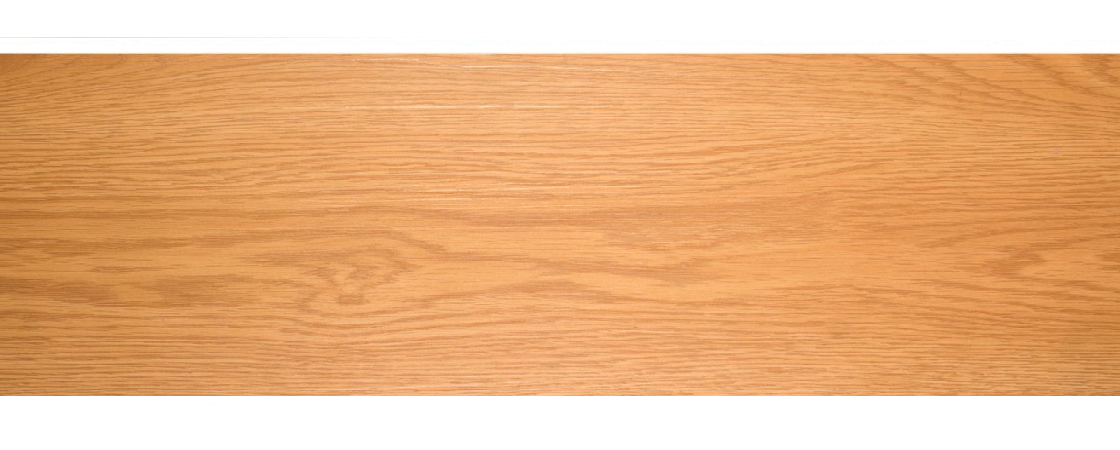
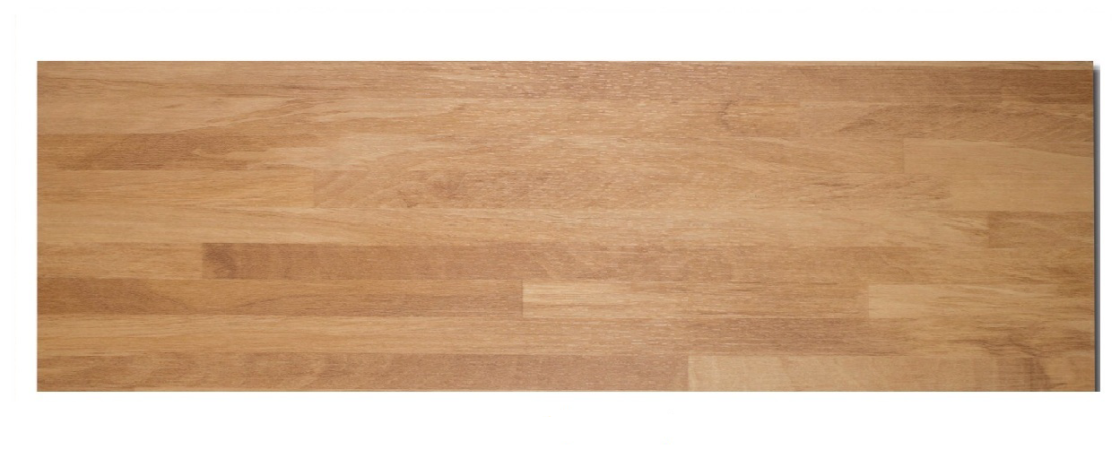
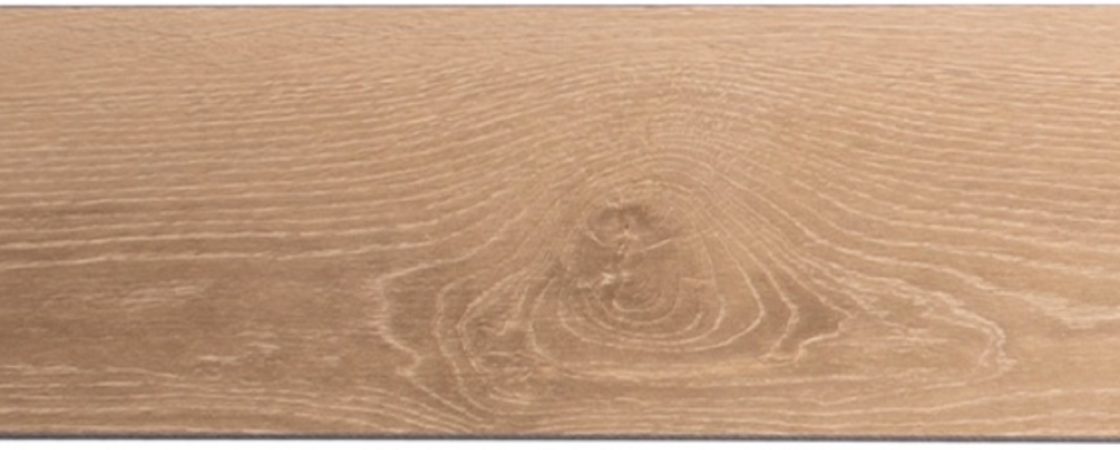
TWS-7030-20
Summer Cherry
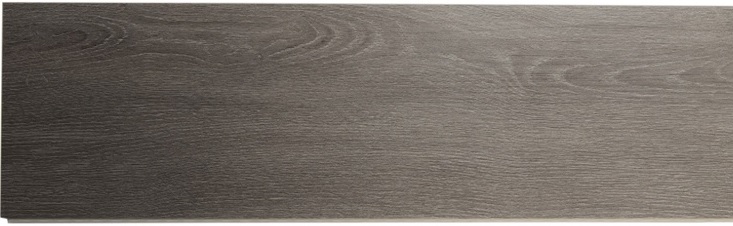
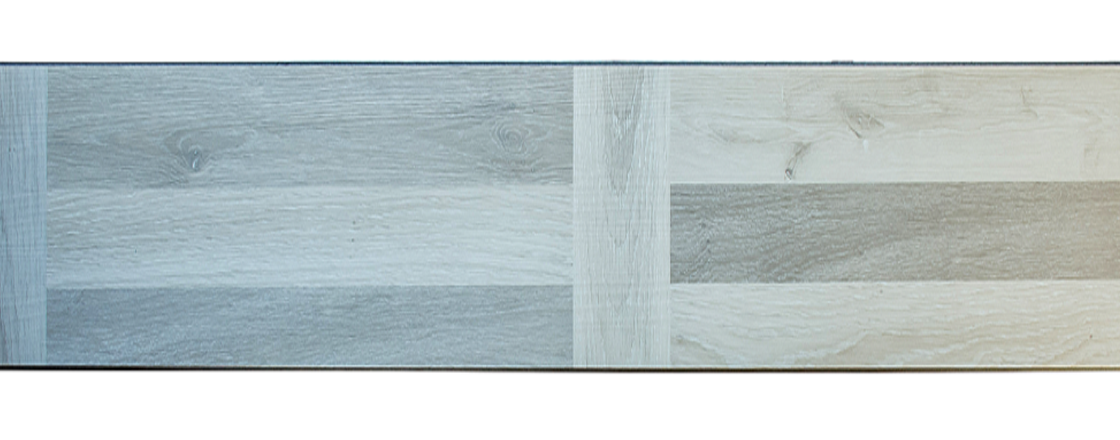
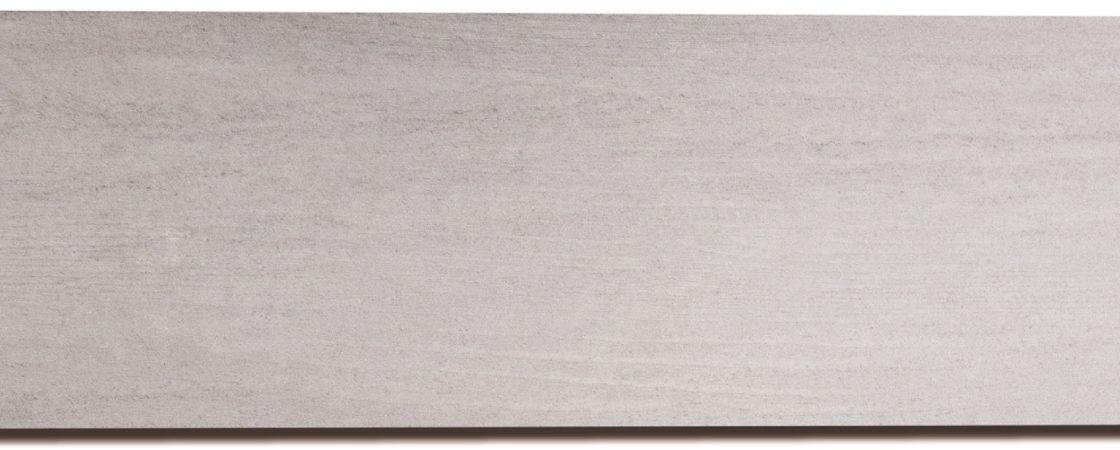
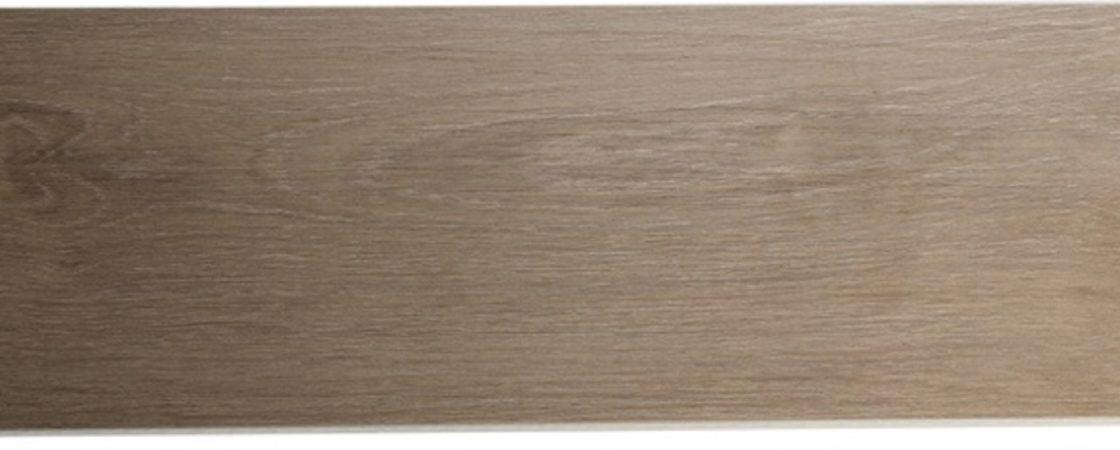
TWS-8857L-6
Midnight Grey
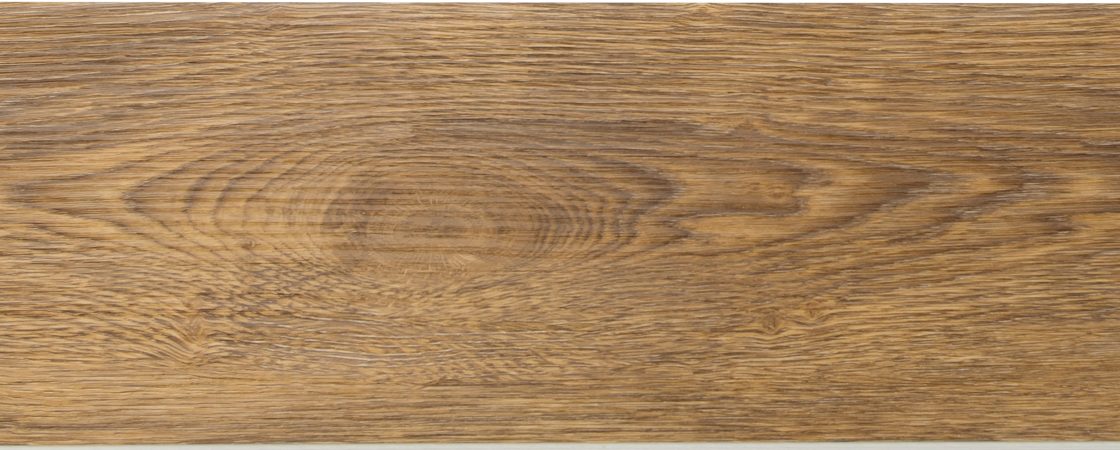
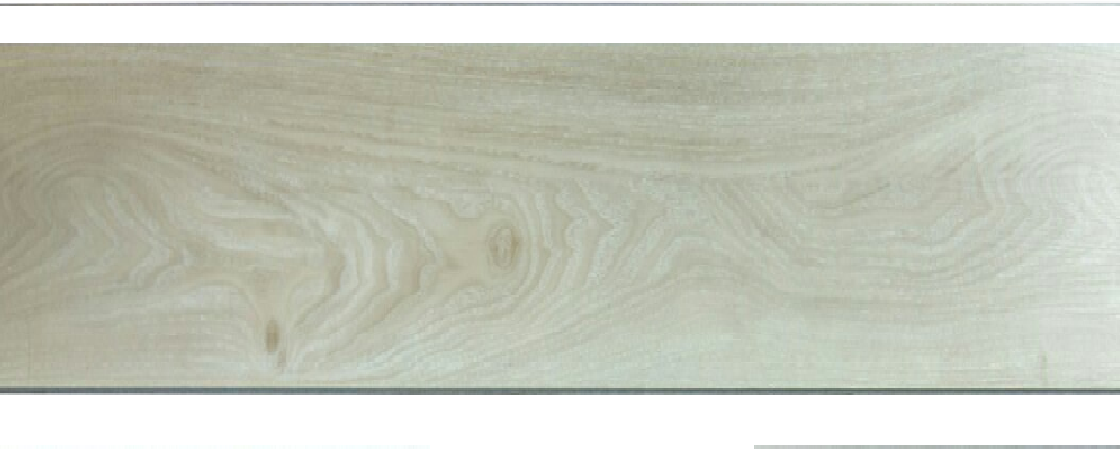
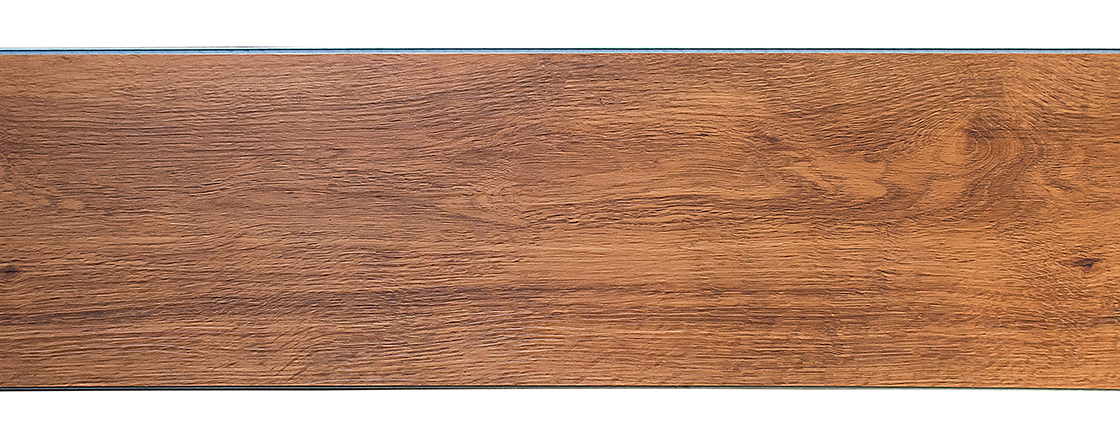
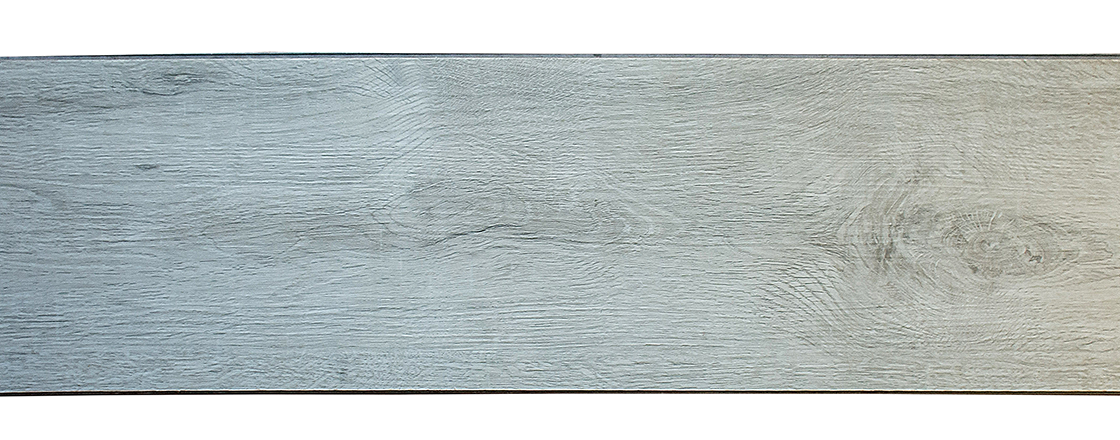
TWS-8082
UrbanWood
PVC Luxury Vinyl Floor
၎
င
၎
၎
၎
င
၎
၎
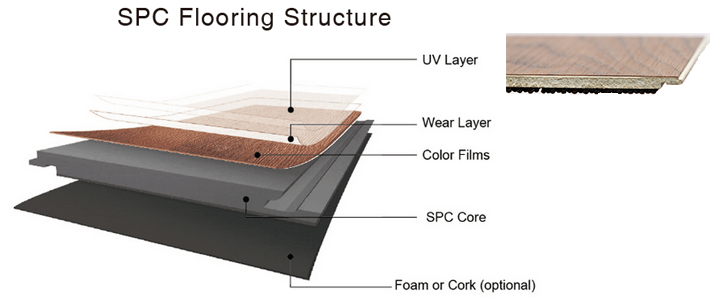
SPC Luxury Vinyl Floor
Vinyl floor family ထဲ့ကနောက်ထပ် ထူးခြားကောင်းမွန်တဲ့ ကြမ်းခင်းတစ်မျိုးဖြစ်တဲ့ Rigid Core Vinyl SPC (Solid Polymer Composite) floor နဲ့ထပ်မံမိတ်ဆက်ပေးလိုက်ပါတယ်။
Wear layer အပေါ်မျာ UV Coating တလွှာပါတာကြောင့် ပွတ်တိုက်မှုဒါဏ်ကို ခံနိုင်ရည်ပိုရှိစေမှာဖြစ်ပြီး နေရောင်ခြည်ကြောင့် အရောင်လွင့်ခြင်းကိုလည်း ကာကွယ်ပေးပါတယ်။ အလင်းပြန်ခြင်းကိုလျော့ချပေးနိုင်တာကြောင့် တကယ့်သစ်သားကဲ့သို့ အသွင်အပြင်မျိုး ပိုမိုမြင်တွေ့ရစေပါတယ်။ ဒါ့အပြင် limestone ပိုမိုပါဝင်တဲ့အချိုးအစားက 100% water resistance ဖြစ်စေပြီး၊ အောက်ဆုံးအလွှာဖြစ်တဲ့ IXPE ဖော့ပါဝင်တာကြောင့် အသံစုပ်ယူမှုအားနှစ်ဆ၊ moisture ဒါဏ်ကိုခံနိုင်ရည်နှစ်ဆ ပိုမိုကောင်းမွန်စေပါတယ်။
တင်းမာမှုမရှိတဲ့ ခြေဖဝါးအထိအတွေ့နဲ့အပူအအေးမျှတ စေတဲ့ Touchwood ရဲ့ new series SPC Vinyl Floor များက လူကြီးမင်းရဲ့အိမ်၊ ရုံးခန်း၊ ဟိုတယ်နဲ့ အခြား commercial application မျိုးစုံအတွက်ပြည့်စုံတဲ့ ကြမ်းခင်းဖြစ်ကြောင်းအာမခံပါတယ်။
၎
င
၎
၎
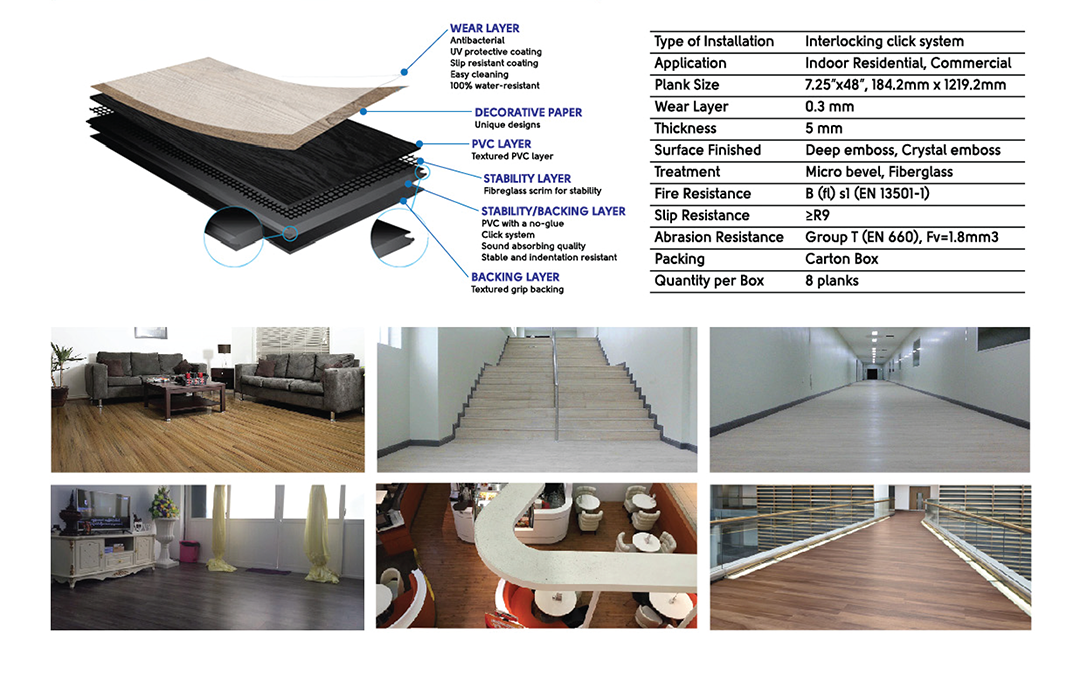
Specification
PVC & SPC LUXURY VINYL FLOOR
အလွှာပေါင်း ၆-လွှာဖြင့် ခိုင်မာစွာ ပေါင်းစပ်တည်ဆောက်ထားတဲ့ အတွက် အပြည့်စုံဆုံး ၊ အကောင်းမွန်ဆုံးလို့ ဆိုနိုင်တဲ့ Luxury Vinyl Floor သည် ရေစိုခံ ၊ အကြမ်းခံ ၊ ဇိမ်ခံကြမ်းခင်းဖြစ်တဲ့ အပြင် အခြားကြမ်းခင်းတွေနဲ့အတူ သာလွန်ကောင်းမွှန်တဲ့ အချက်တွေကတော့…..
၎
င
၎
၎
ကျန်းမာရေးနဲ့ ညီညွှတ်တဲ့ အားသာချက်များ (Healthy Advantages)
လူကိုအန္တရယ်ဖြစ်စေနိုင်တဲ့ formaldehyde လုံးဝမပါ၊ အနံ့အသက်မရှိ (odorless)၊ အဆိပ်ဓါတ်ကင်းစင် (non-toxic)၊ အလွယ်တကူသန့်ရှင်း ထိန်းသိမ်းနိုင် (east to clean & maintain)
အန္တရာယ်မဖြစ် ဘေးကင်းတဲ့ စံနှုန်းများ(Safety Criteria)
ချော်လဲကျခြင်းမျိုးမဖြစ်စေတဲ့ မျက်နှာပြင် (Slip resistance)၊ အသံစုပ်ယူမှုအားကောင်းခြင်း (Sound reduction)၊ မီးတောက်ဖြစ်ခြင်း၊ မီးခိုးထွက်ခြင်း အဆင့်တွေလျော့နည်းခြင်း (Flammability & Smoke Density B1 Level)၊ ပွန်းပဲ့ဒဏ်ခံနိုင်ခြင်း (Abrasion/Scratch resistance)
ထူးခြားကောင်းမွန်တဲ့ သတ်မှတ်ချက်များ (Performance Specification)
၎
င
၎
၎
ရေစိုခံနိုင်ခြင်း
(100% Water Proof)
မီးဒါဏ်ခံနိုင်ခြင်း
(Anti-Flaming & Fire Proof)
ပြောင်းလွယ်ပြင်လွယ်ရှိပြီး စင်းရာမထင်ခြင်း
(Flexibility & Wearable)
အပူနဲ့ထိတွေ့ပြီး ကော့ညွှတ်ခြင်းမရှိ အတိုင်းအတာတည်ငြိမ်ခြင်း
(No curling after exposure to heat & Dimensional stability)
ပြန်လည်အသုံးပြုနိုင်တဲ့အတွက် သစ်မာသုံးစွဲခြင်းကြောင့် သစ်တောပြုန်း
တီးခြင်းနှင့်အတူ သဘာဝဘေးအန္တရာယ်ကျရောက်ခြင်းမှ ကာကွယ်ပြီးသားဖြစ်သလို၊
(eco-friendly) ပတ်ဝန်းကျင်ထိန်းသိမ်းပြီး ရေရှည်တည်တံ့စေမည့်လူနေရပ်ဝန်း
(Sustainable Living Environment) ကိုဖြစ်စေနိုင်ခြင်း (Recyclable)
အောက်ခံ Foam ခင်းစရာမလိုခြင်း
(No underlayment required)
ဖိအားကြောင့်ပိပြား ချိုင့်ဝင်ခြင်းမရှိခြင်း
(Residual indentation after static load)
ခင်းရလွယ်ကူခြင်း
(Easy and fast installation)
အလင်းရောင်ကြောင့် အရောင်လျော့ကျမှုမရှိခြင်း
(Colour fastness to light)
အပြည့်စုံဆုံးသွင်ပြင်ဖြစ်ခြင်း
(Perfect Feature)
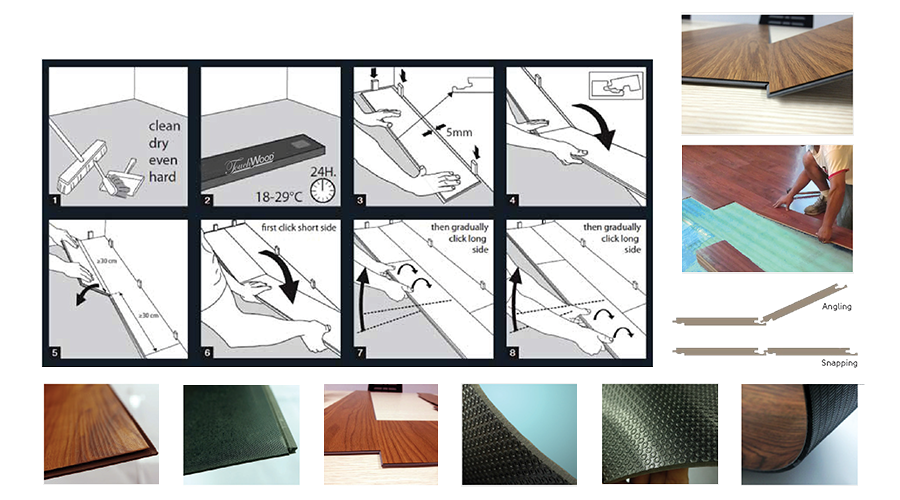
Installation & Maintenance
၎
င
၎
၎
SUITABLE SURFACES
Rough textured or porous surfaces. Well-bondedsolid floors. Dry, clean, well-cured concrete (cured for at least 60 days prior). Wood floors with plywood on top. All surfaces must be clean and dust free.Cab be installed over radiant heated floors (do not turn heat above 29˚C or 85˚F)
Unsuitable surfaces
Rough, uneven surfaces including carpet and underlay.This product is not suitable in rooms that could potentially flood, or rooms that have damp concrete or saunas. Do not install this product in areas which are exposed to long term direct sunlight such as sun rooms or solariums.
WARNING: DO NOT REMOVE OLD RESILIENT FLOORING. THESE PRODUCTS MAY CONTAIN EITHER ASBESTOS FIBERS OR CRYSTALLINE SILICA, WHICH CAN BE HARMFUL TO YOUR HEALTH.
PREPARATION
The vinyl planks should be allowed to acclimatize at room temperature (approx. 20˚C/68˚F) for 48 hours prior to installation. Carefully check planks for any defects before installation.Check that all BATCH NUMBERS and ITEM NUMBERS are the same and that you have purchased sufficient material to complete the job. Remove any traces of glue or residue from the previous flooring.
New concrete floors need to dry out for at least 60 days prior to installation. Wood plank floors require a plywood subfloor. All nail heads must be driven down below the surface. Securely nail all loose boards. Scrape, plane or fill uneven boards, holes or cracks using floor-leveling compound if sub-floor is uneven – over 3.2 mm (1/8 in) within a span of 1.2 m (4 ft). If installing over existing tile, use a floor leveling compound to skim coat grout lines. Make sure the floor is smooth, clean, and free of wax, grease, oil or dust, and sealed as necessary before laying planks.
Tools and Supplies
Utility knife, tapping block, rubber mallet, spacers, pencil, tape measure, ruler and safety goggles.
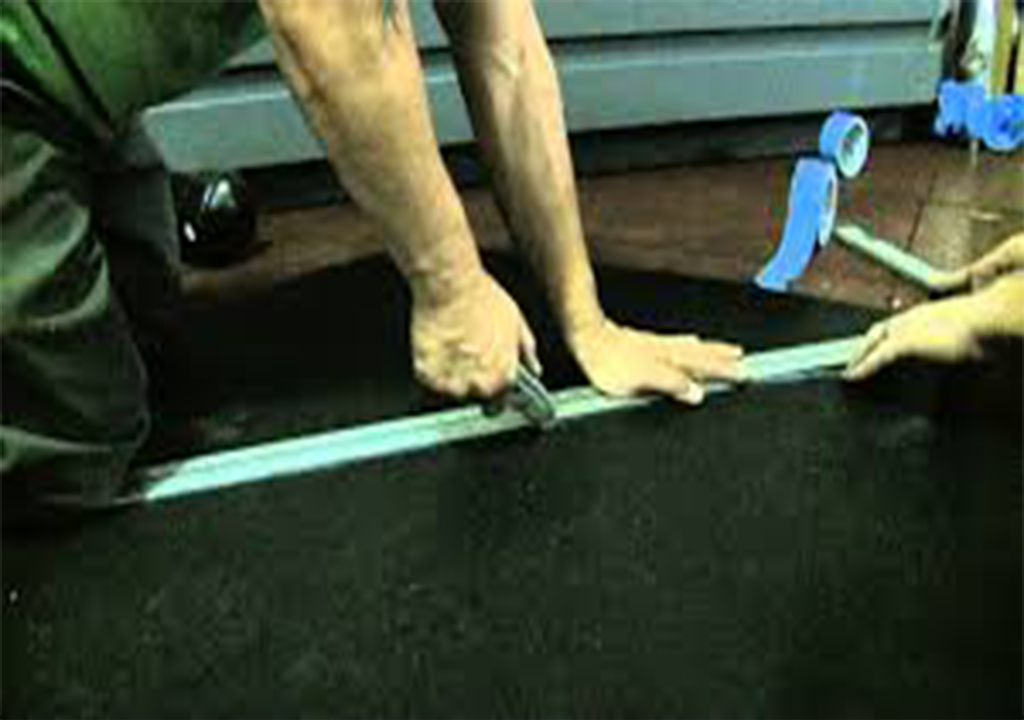
INSTALLATION
Start in a corner by placing the first plank with the tongue side facing the wall. Use spacers along each wall to maintain an expansion space of 8–12 mm (5/16 in – 3/8 in ) between the wall and the flooring.
Diagram 1.
To attach the second plank, insert the end tongue into the end groove of the very first plank at an angle of approx 15-20 degrees. When lowered the plank will click into place. Line up edges carefully.The planks should be flat to the floor .
Diagram 2.
Continue connecting the first row until you reach the last full plank. Fit the last plank by rotating the plank 180º with the pattern side upward, place beside row.Measure and mark than using a ruler and utility knife, score the plank and snap off.Attach as described above.
Diagram 3.
Begin the next row with the off-cut piece from the previous row to stagger the pattern. Pieces should be a minimum of 20cm (8 in) long and joint offset should be at least 40cm (16 in).
Diagram 4.
NOTE It is a faster to assemble planks into a new row at the ends and then attach the entire row to the previous row on the long sides.
To start your second row, lay your first plank on the subfloor. Take your second plank, insert the end tongue into the end groove of the first plank at an angle approx 15-20 degrees .When lowered ,the plank wil click into place with light pressure.The plank should be flat to the floor.Make sure gaps are as small as possible.Continue assembling the planks this way until you have your second row complete.
To attach the second row to the first row , tilt and push the side tongue into the side groove of the first panel at an angle of approx 15-20 degrees. Lower and click into place lining the edges up carefully.Continue laying remaining planks in the manner.
Diagram 5.
To fit the last row, lay a plank on top of the previous Row.With the tongue to the wall,lay another plank upside down on the one to be measured and use it as a ruler. Don’t forget to allow room for spacers. Cut the plank with a utility knife and attach into position.
Diagram 6.
Door frames and heating vents also require expansion room. First cut the plank to the correct length. Then place the cut plank next to its actual position and use a ruler to measure the areas to be cut out and mark them. Cut out the marked points allowing the necessary expansion distance on each side.
Diagram 7.
You can trim for door frames by turning a plank upside down and using a handsaw to cut away the necessary height so that planks slide easily under the frames.
Diagram 8.
CARE AND MAINTENANCE
Sweep regularly to remove surface grit and dust. Use a damp cloth or mop to clean up any dirt and footprints but avoid using excessive moisture. All spills should be cleaned up immediately. CAUTION: Planks are slippery when wet.
Do not use a wet spray micro fibre mop. Never use wax, polish, abrasive cleaners or scouring agents as they may dull or distort the finish.
High heels can damage floors.Use protective pads under furniture. Use doormats at entrance ways to protect the floor from discoloring. Do not allow pets with unclipped nails to scratch or damage the floor.
Avoid exposure to direct sunlight for prolonged periods of time. Use drapes or blinds to minimize direct sunlight during peak sunlight hours. It’s a good idea to save a few planks in case of accidental damage. Planks can be replaced or repaired by a flooring professional.
၎
င
၎
၎
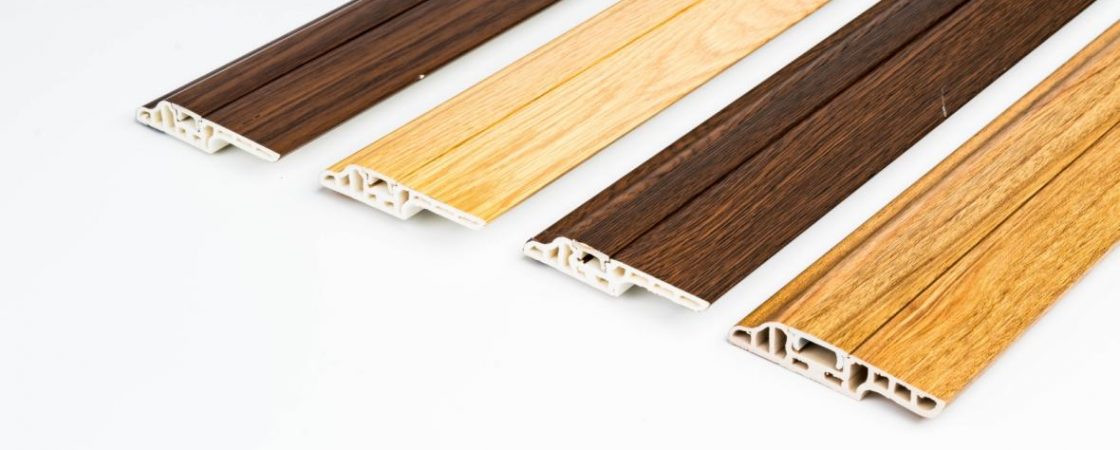
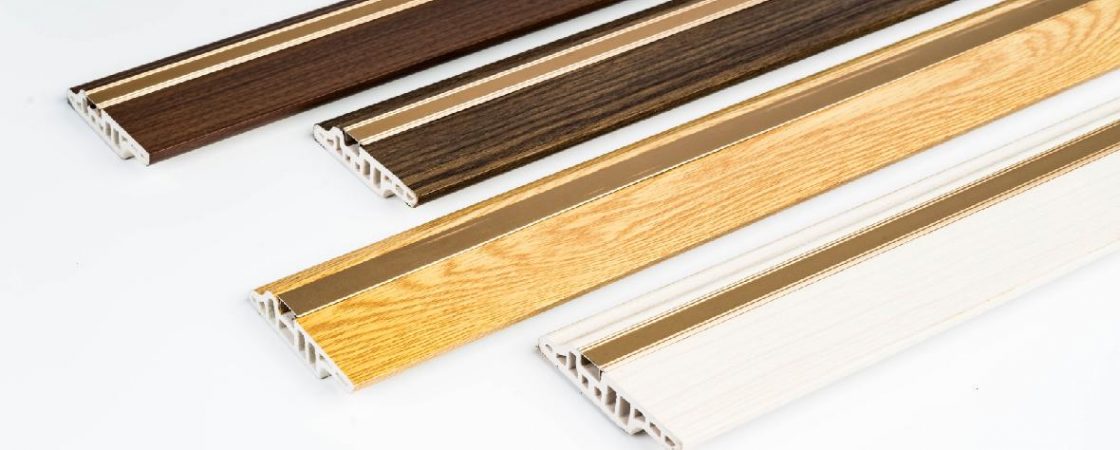
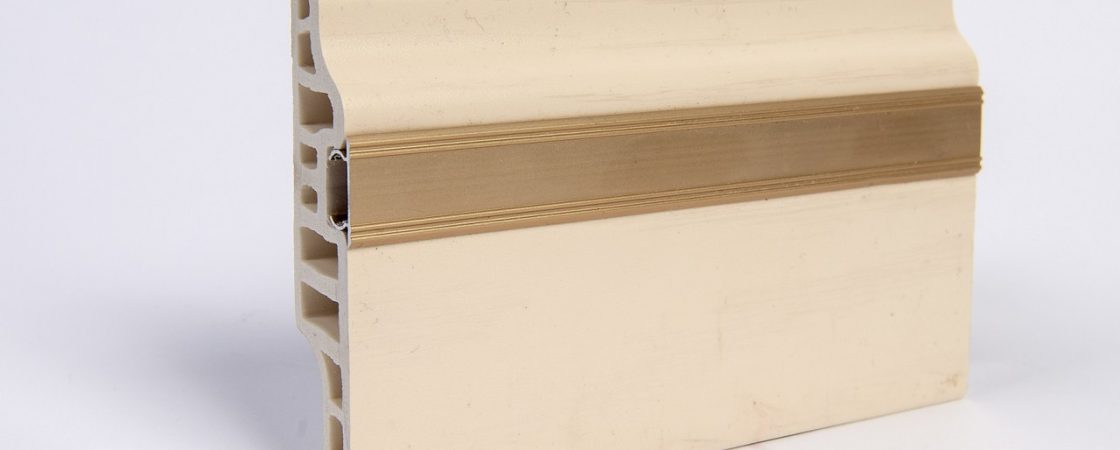
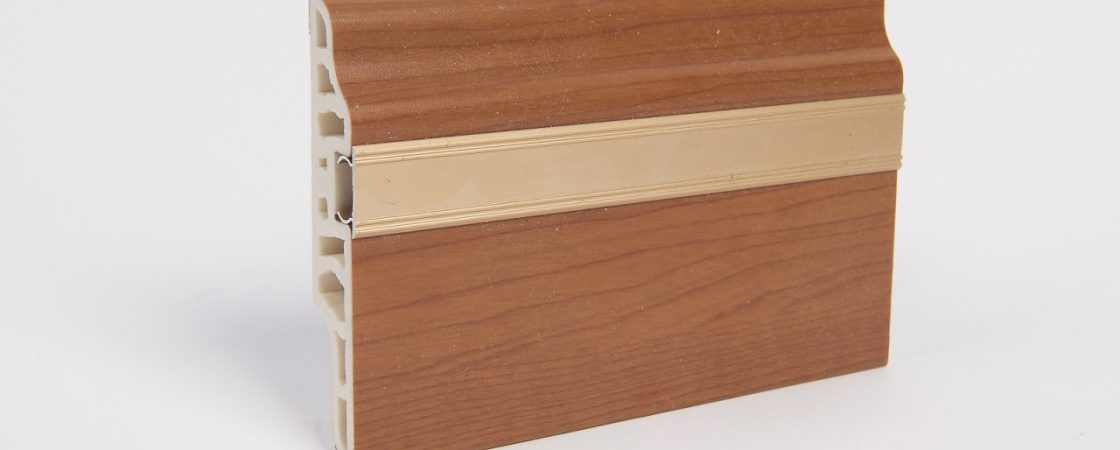
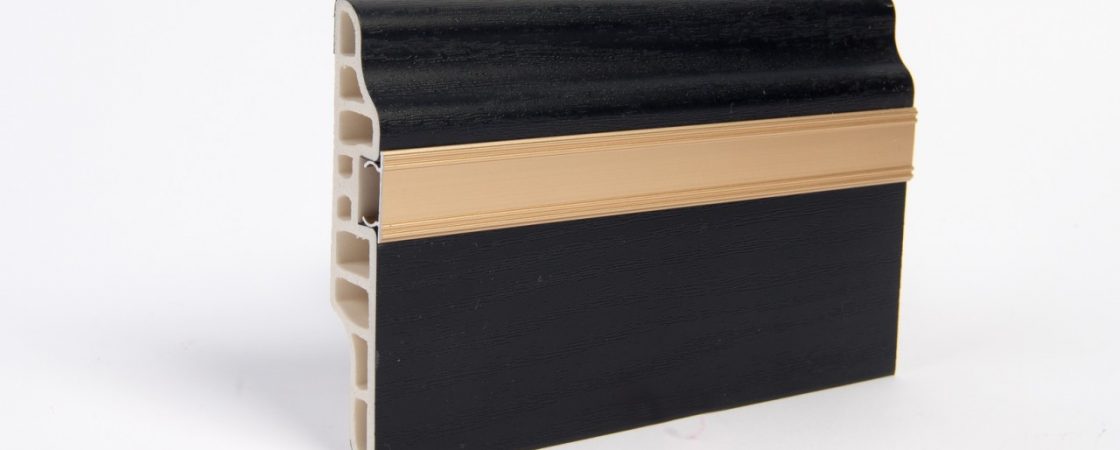
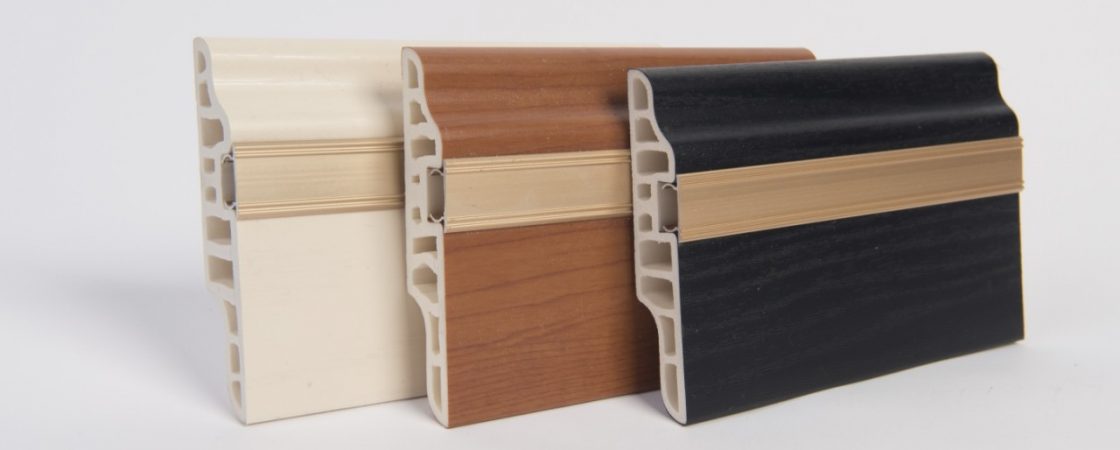
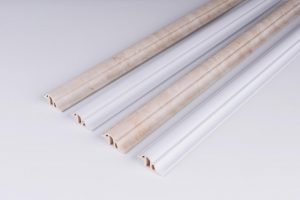
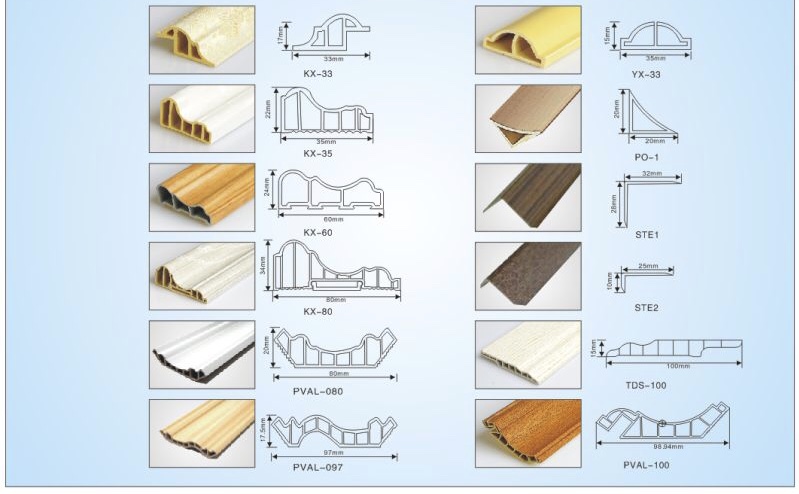
Skirtings
၎
င
၎
၎
၎
င
၎
၎
၎
င
၎
၎
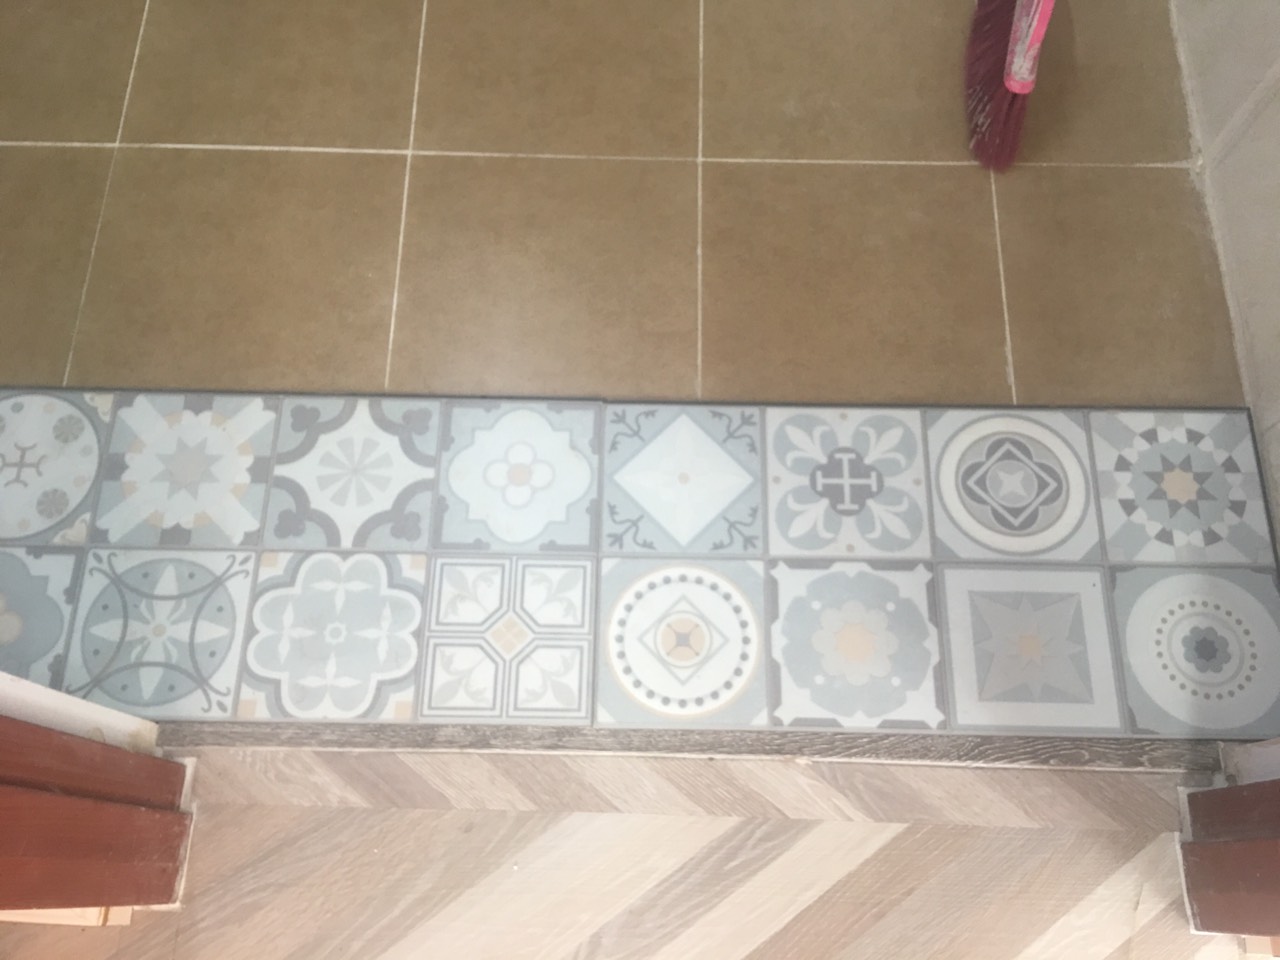
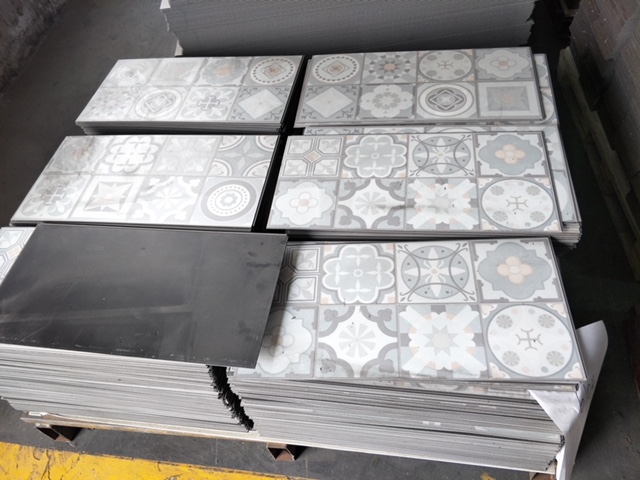
Vinyl Tile
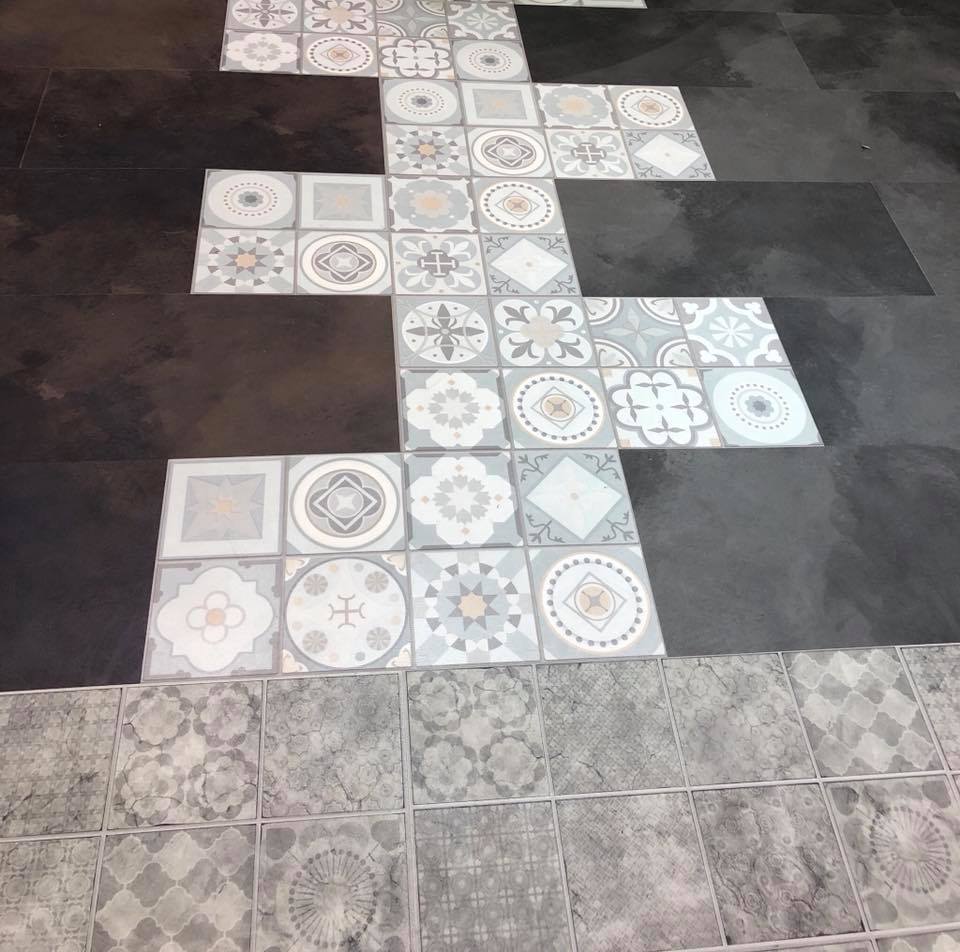

Specification of Vinyl Tile (PVC)
| Type | Click Type / Glue Down Type |
| Size-W x L ( inches ) | 12” x 12” , 12” x 24”, 18” x 18” |
| Available Thickness (mm) | 2.0, 3.0, 3.2, 5.0 |
| Wear Layer (mm) | 0.1mm-0.7mm |
| Bevel Edge (mm) | 0.3, 0.5, 0.7, 1.0 |
| Surface Finish | Crystal, Shale, Leather, Matt, Glossy |
| Available Design | Stones, Slate, Marble, Porcelain, Mosaic |
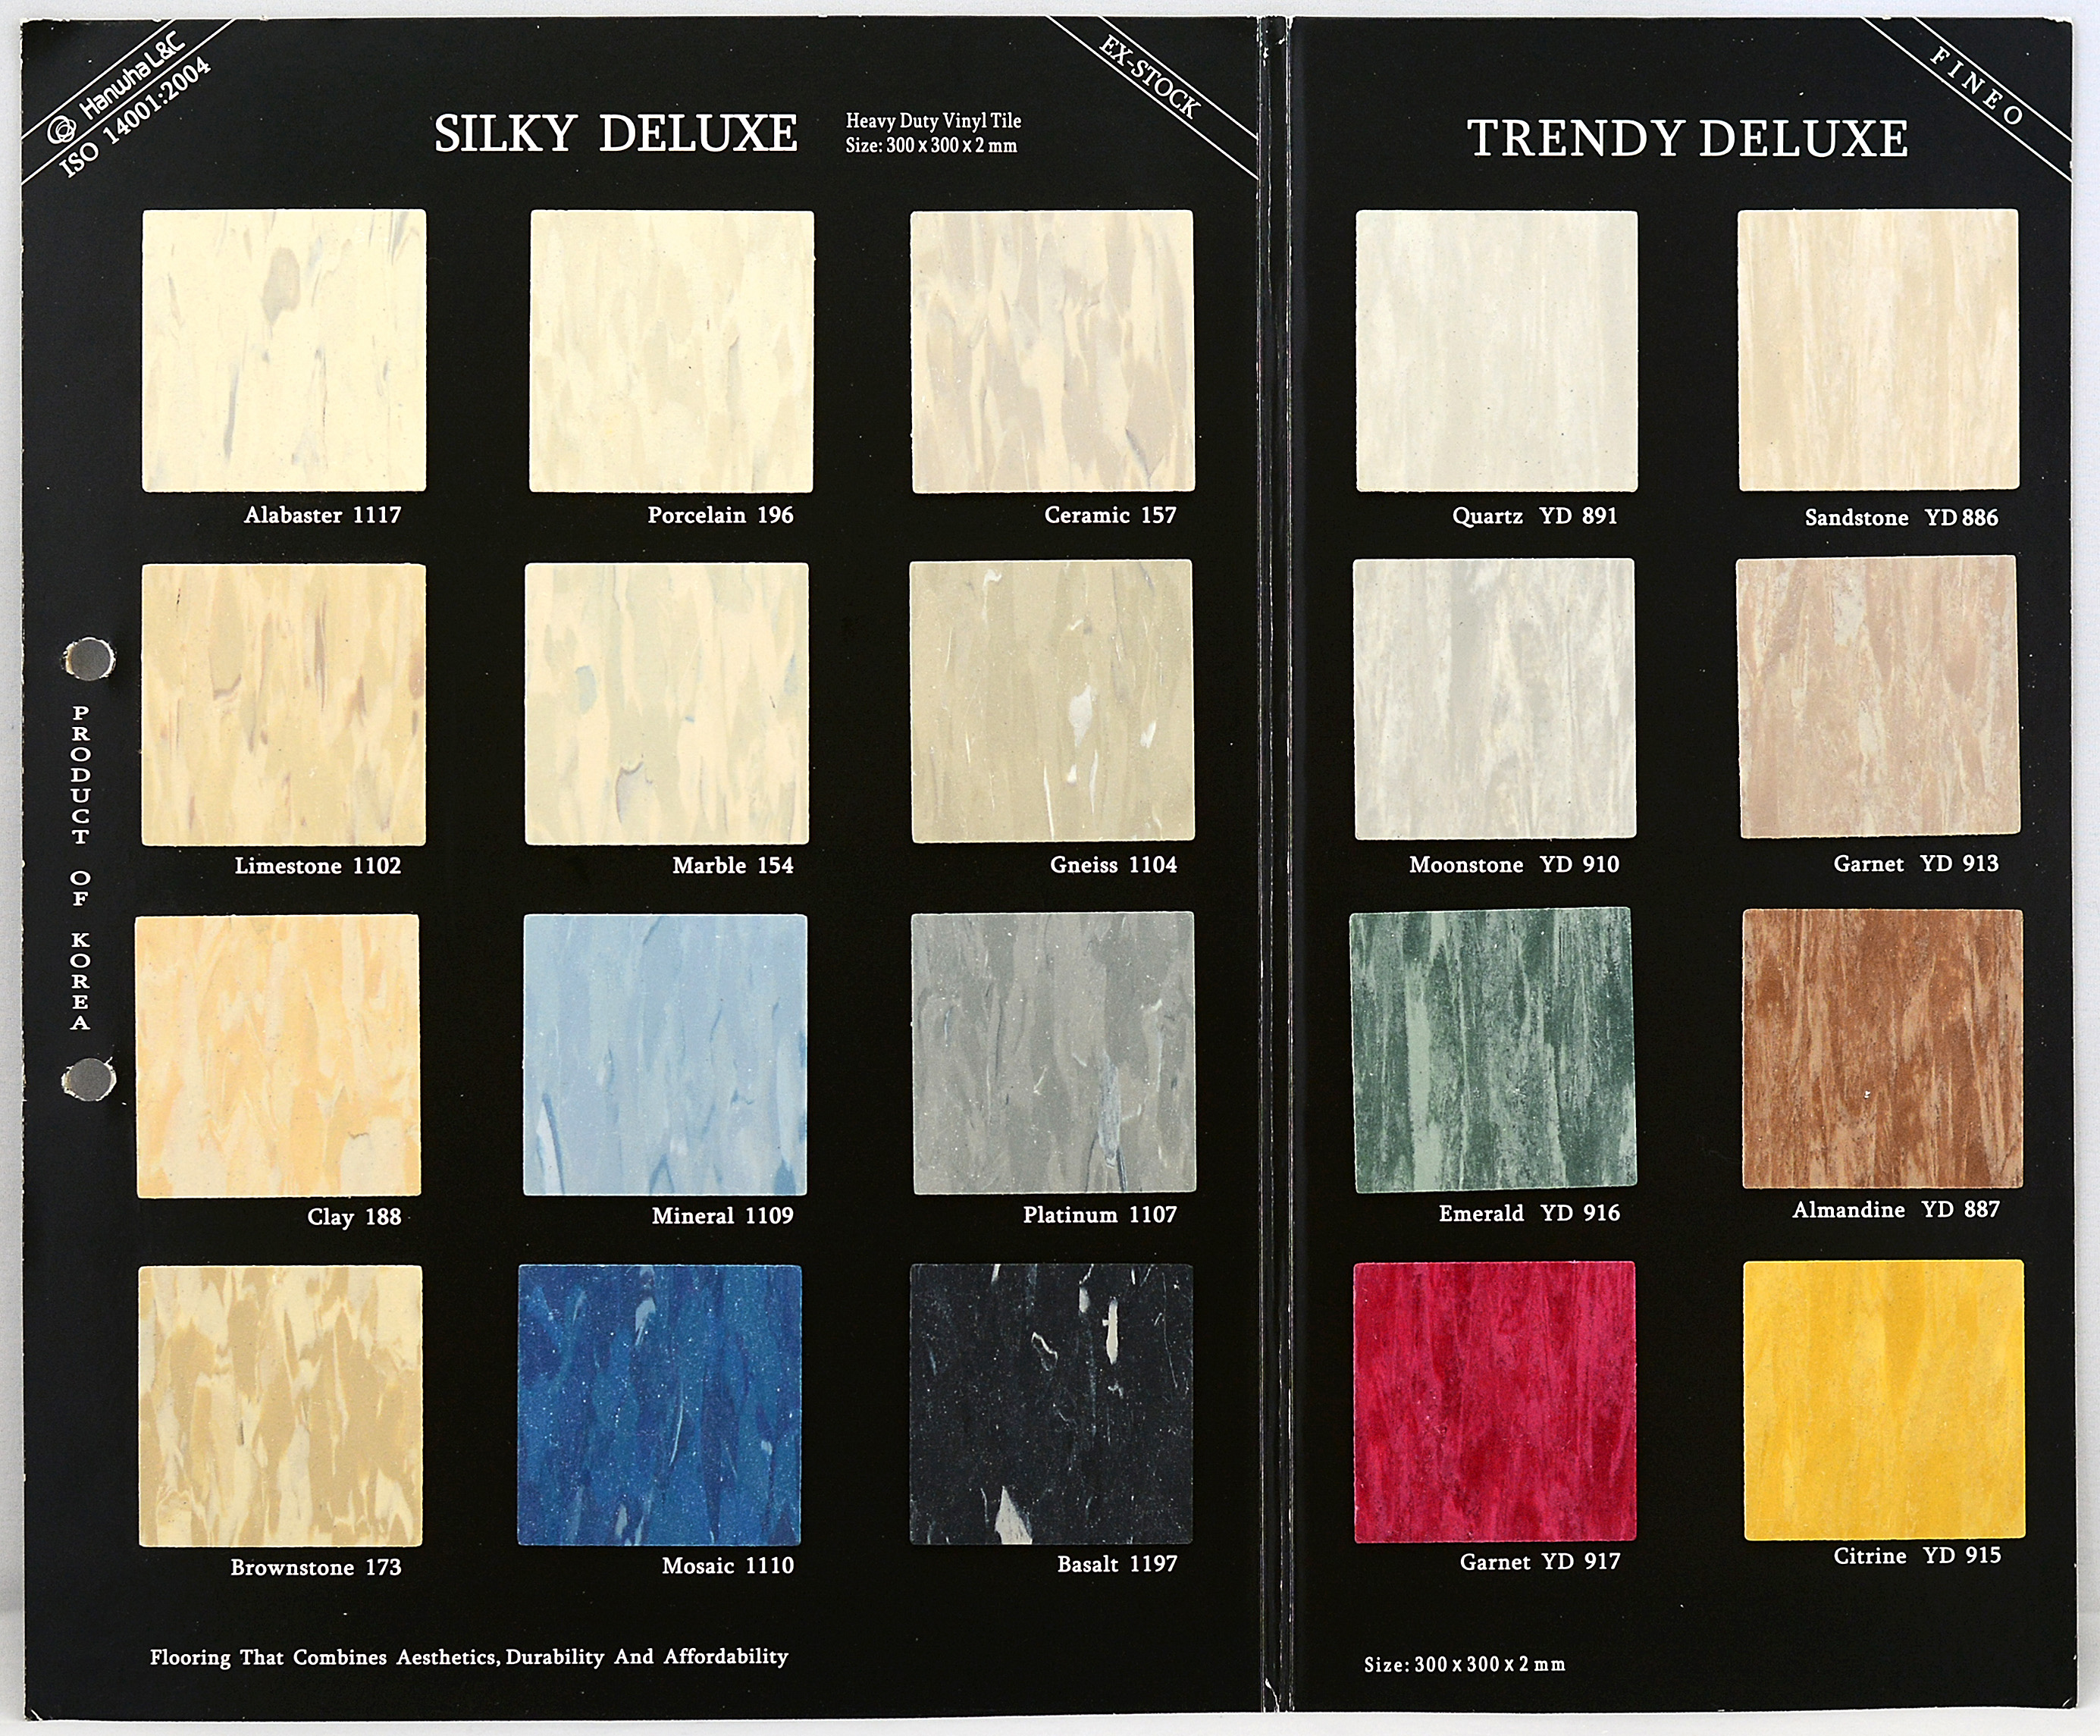
Silky Delux (Vinyl Tile 300mmx300mmx2mm)
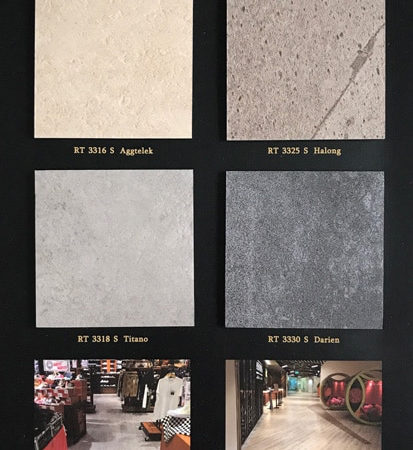
Rhino Floor Vinyl Tile (Stone Allure: 18"x18"x2mm)
Roll Vinyl
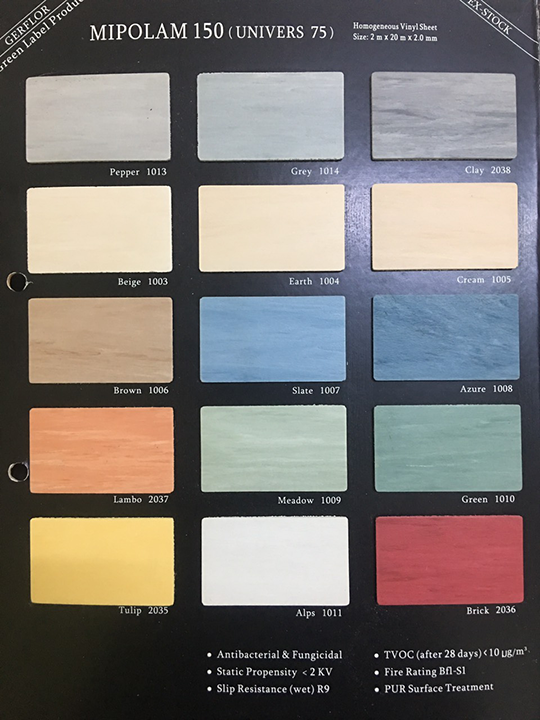
GERFLOR Mipolam 150 (Homogenerous Vinyl Sheet)
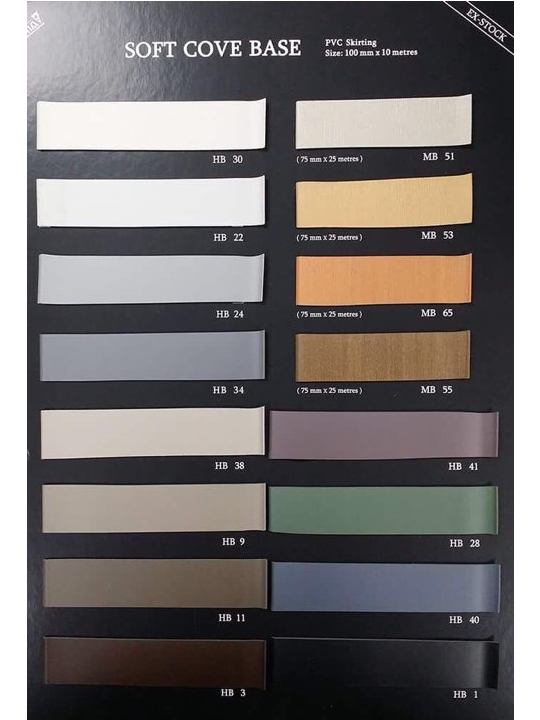
Tajima PVC Skirting Colour Catalog
Silky Deluxe, Trendy Deluxe (Vinyl Tile-Glue Down Type)
Tajima PVC Skirting (HB Series)

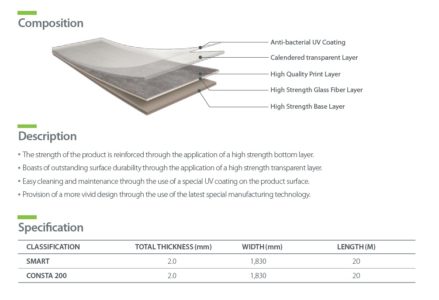
 KCC CONSTA 200 (Vinyl Sheet : 1.83x25mx2.5mm)


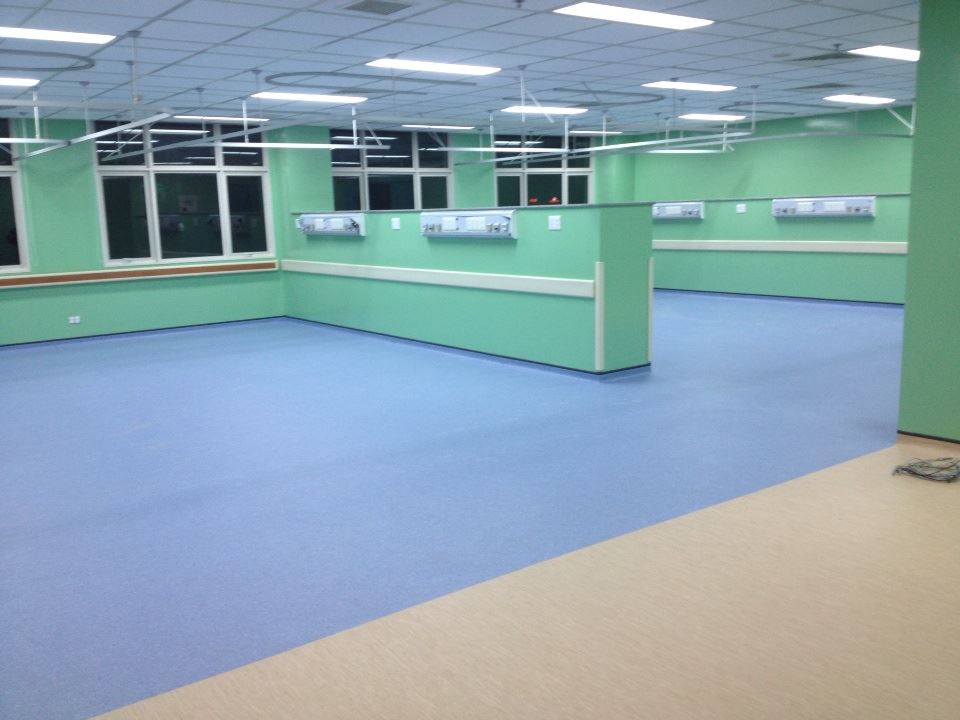
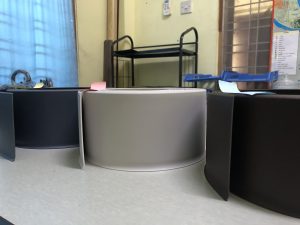
Roll Vinyl Installation at Hospital Project

Roll Vinyl Installation at Hospital Project
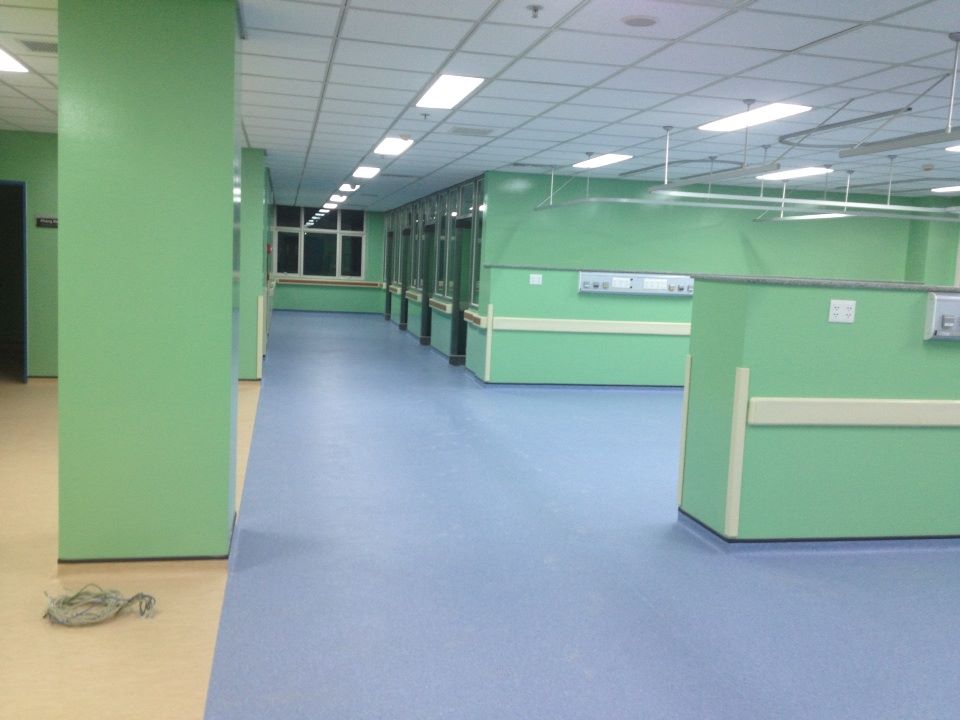
Roll Vinyl Installation at Hospital Project
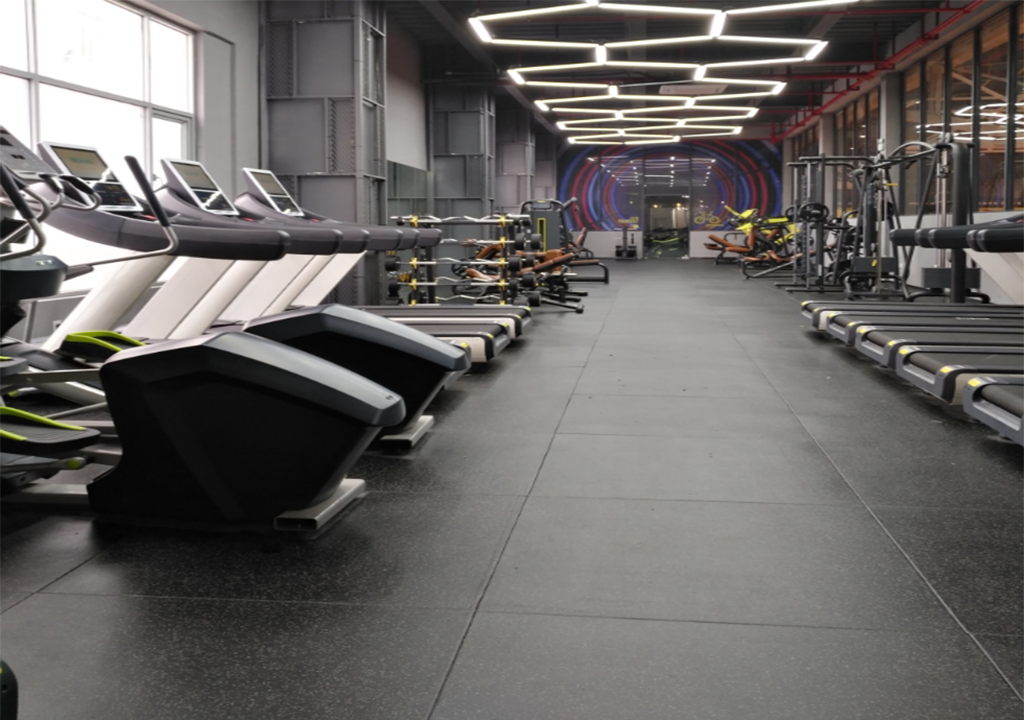
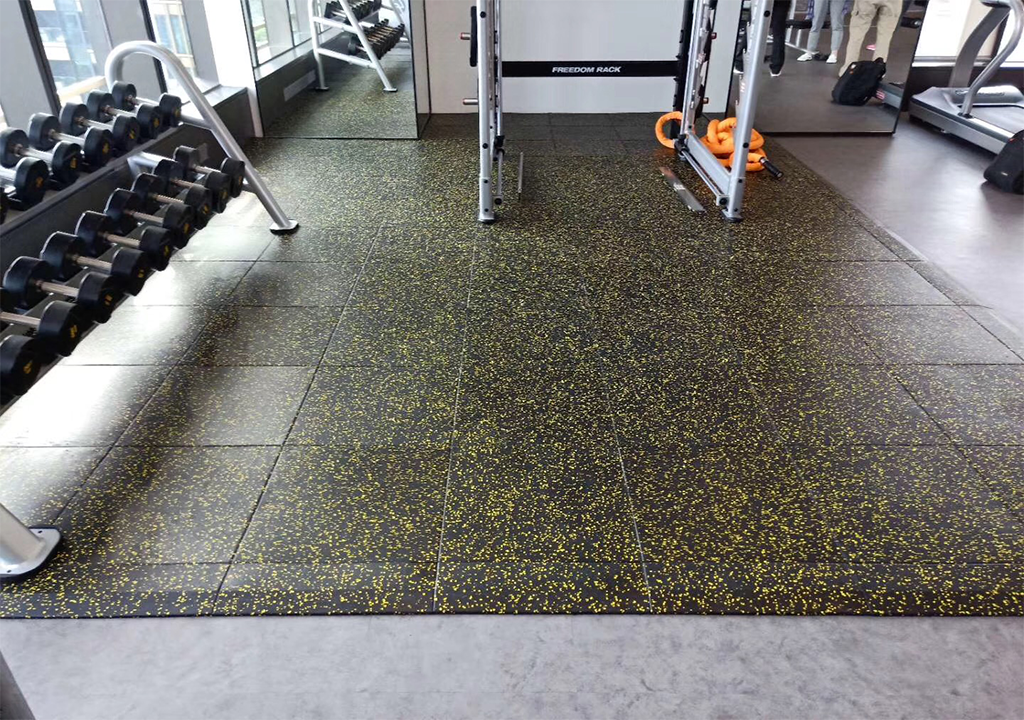
Sport Floor

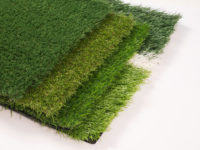
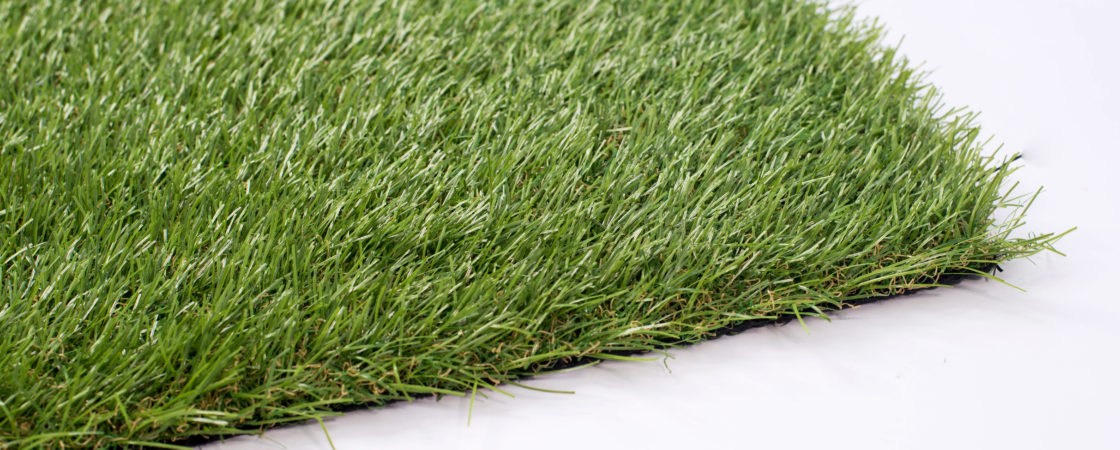
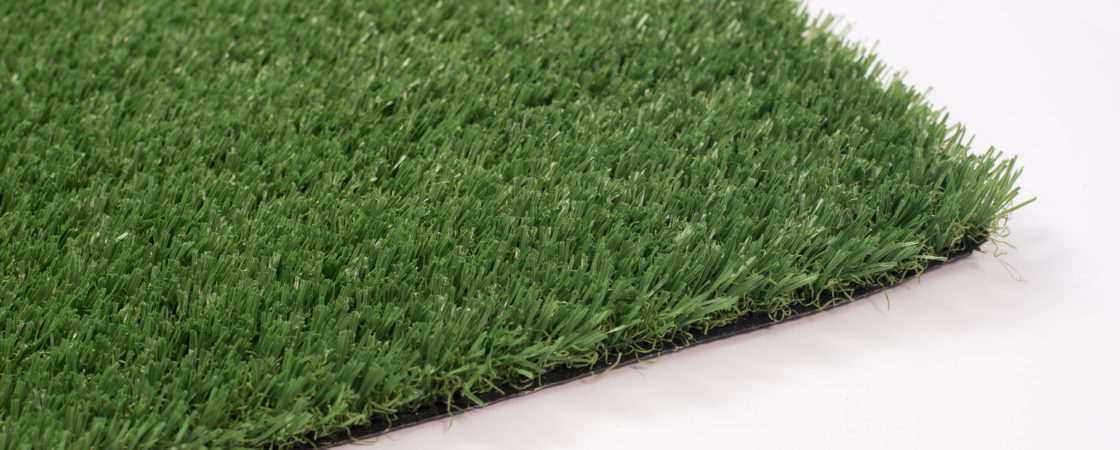
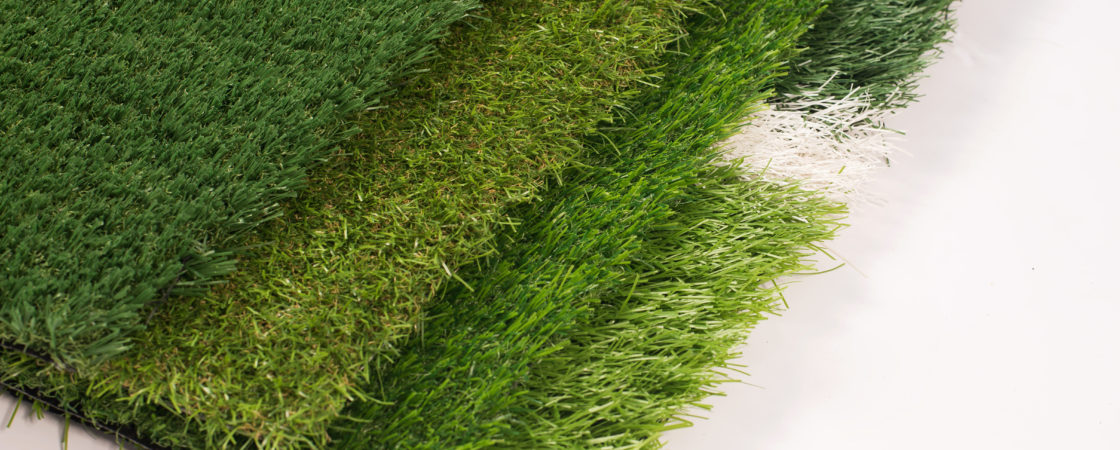
GreenTouch Artificial Turf
| Model No | Multi-used decoration Type GT25216090 |
| Yarn Material | Monofilament P.E + Green curly PP |
| Pile height | 25 mm |
| Stitches | 160/m |
| Density | 16800/sqm |
| Dtex | 9000 |
| Gauge | 3/8” |
| Backing | PP+NET+SBR, 3 tones |
| Size per Roll | 6’-6” x 66’-0” |
၎
င
၎
၎
Indoor type
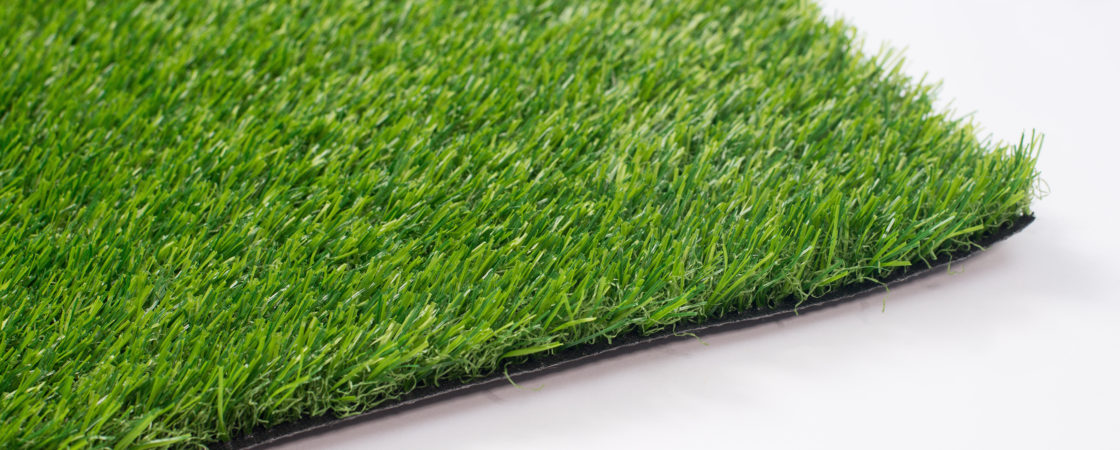
| Model No | Garden / Landscape type – GT25213070 |
| Yarn Material | Monofilament P.E + Yellow Curly PP |
| Pile height | 25 mm |
| Stitches | 130/m |
| Density | 13650/sqm |
| Dtex | 7000 |
| Gauge | 3/8” |
| Backing | PP+NET+SBR, 4 tones |
| Size per Roll | 6’-6” x 82’-0” |
၎
င
၎
၎
Garden/Landscape Type
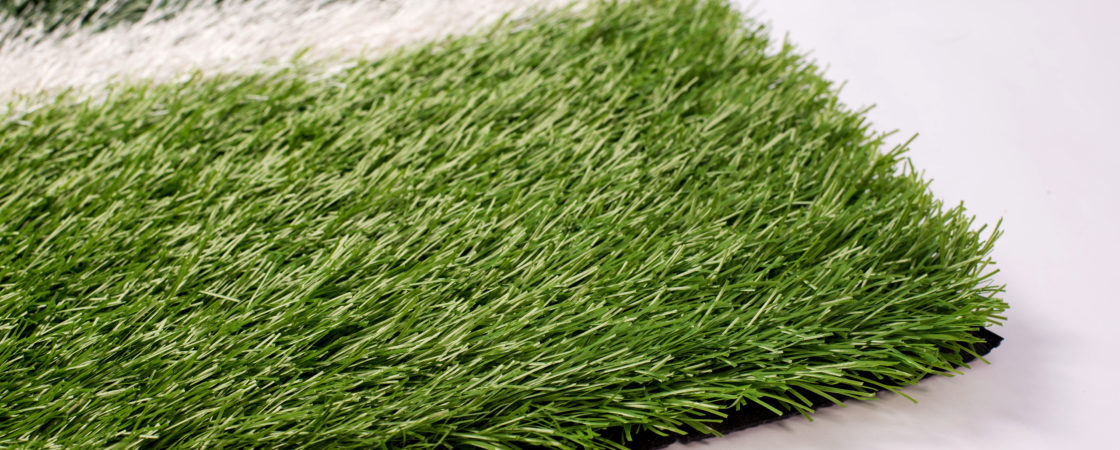
| Model No | Football ( Fusal – Infilled type ) GT50416588CL-101 + 102L |
| Colour | Dark Green / Apple Green / White |
| Yarn Material | Monofilament P.E, Spine Shape |
| Pile height | 50 mm |
| Stitches | 165/m |
| Density | 10395/sqm |
| Dtex | 8800 |
| Gauge | 5/8” |
| Backing | PP Woven +NET+SBR, 2 tones |
| Size per Roll | 6’-6” x 66’-0” |
၎
င
၎
၎
Futsal/Football (Infilled) Type
| Model No | Children Sport type – GT25221098 |
| Yarn Material | Monofilament P.E + Green Curly PP |
| Pile height | 25 mm |
| Stitches | 210/m |
| Density | 22050/sqm |
| Dtex | 9800 |
| Gauge | 3/8” |
| Backing | PP+NET+SBR,4 tones |
| Size per Roll | 6’-6” x 66’-0” |
Children Sport

Installation & Maintenance
၎
င
၎
၎
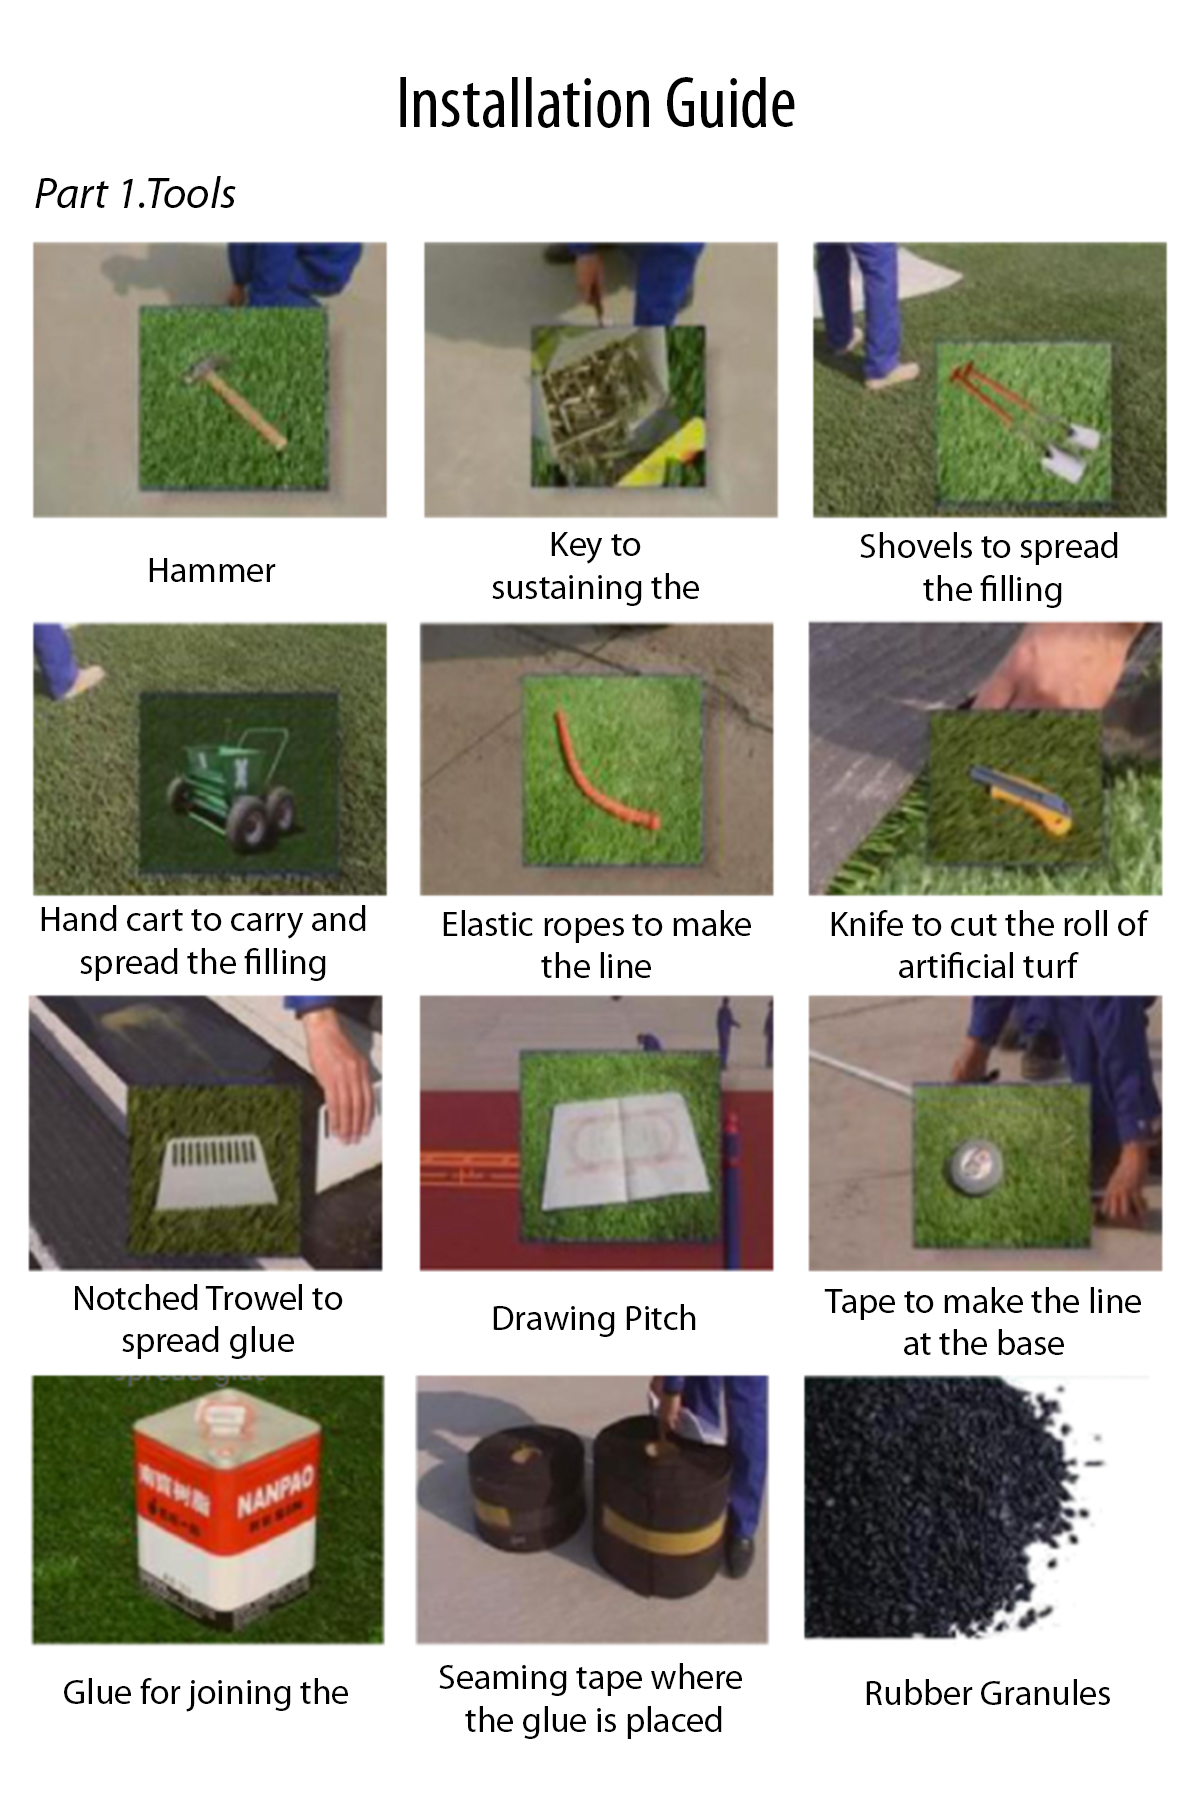
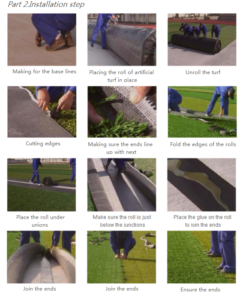
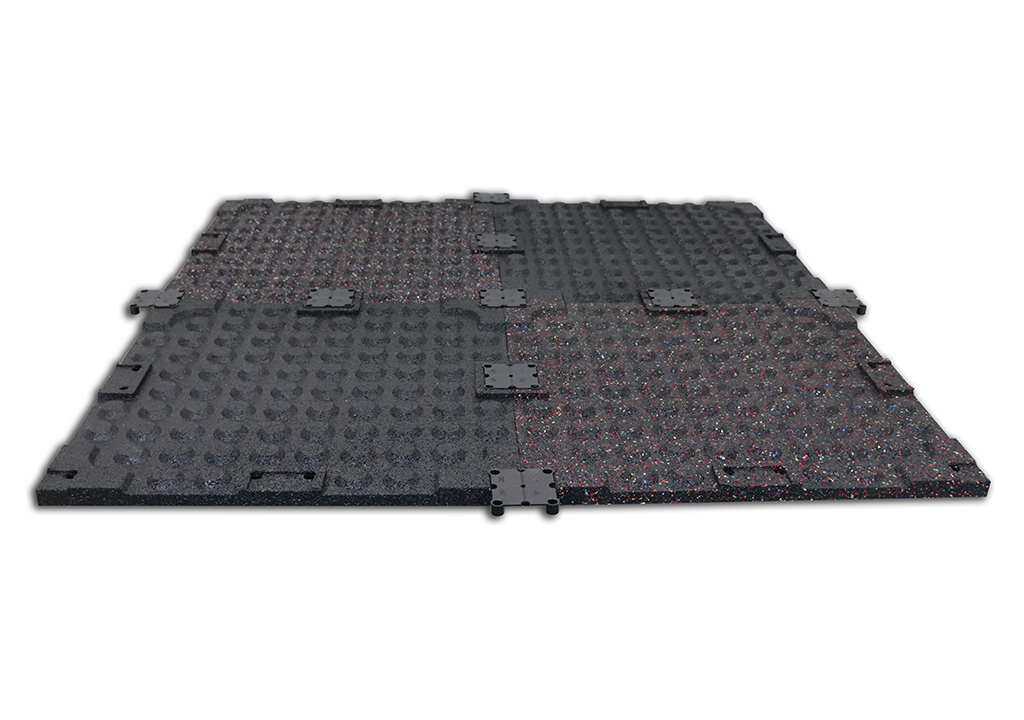
Installation Guidance of Artificial Turf for Football Field
(1) Construction preparation work
Site foundation plays an important role in artificial turf site. The smoothness, stability and drainage of site foundation will affect the use effect of artificial turf site. Therefore, before the formal paving of lawn, the following construction preparation work should be done well.
(1) The foundation is usually made of cement concrete, asphalt concrete or cement powder layer, sand gravel layer and so on, which has certain strength and stability;
(2) The foundation cannot produce cracks and freezing;
(3) For the flatness of the foundation, 3 meters straightedge error is less than 6mm; the site must have a certain slope to meet the requirements of site drainage;
(4) The foundation surface should be kept clean and dry, and the cement concrete foundation should be maintained for about 28 days after the completion of the concrete foundation, so as to ensure the
sufficient bonding strength of the base layer.
(2) Measure
In order to ensure the quality and smoothness of artificial grass paving, and ensure the quality and
perception of artificial grass, the artificial grass paving procedure is as follows:
Find the center point of the site and the two semi-circle, and according to the three point positioning ruler line, set the venue line and sideline intersection, and then set the exact position of field angle, point and line to the Pythagorean theorem, and then set the function point, line position, and use ink or paint line up.
(1) Find the center point of the site and the two semi-circle;
(2) According to the above three point positioning ruler line, set the venue line and sideline intersection;
(3) Set the exact position of field angle, point and line, according to the Pythagorean theorem and then set the function point, line position by using ink or paint.
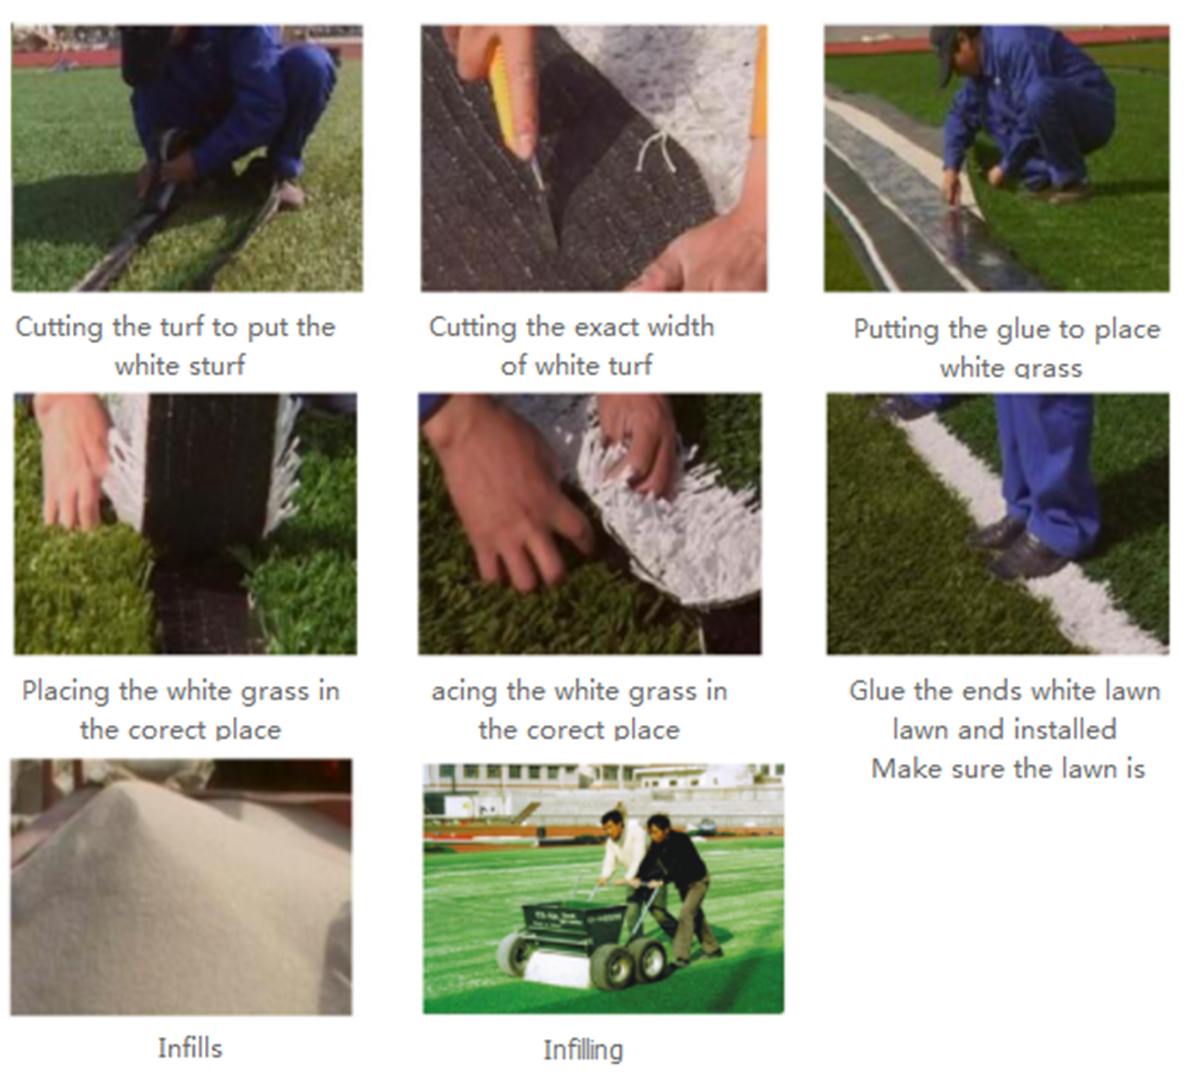
(3) Pavement of football field
(1) The lawn glue must be stored in a cool room; quartz sand and rubber particles can be stored in the open air, but the quartz sand need to prevent rain;
(2) According to the pavement design plan of artificial lawn, paving personnel should pave the lawn one day ahead of schedule, so that the lawn naturally extends to the factory size, which can avoid the lawn joint cracking or protruding due to the lawn deformation and expansion after the completion of the
pavement;
(3) In order to ensure the pavement effect, the direction of the grass fiber should be consistent;
(4) After the lawn is unfolded, the white functional line outside the lawn should be cut down and put aside before the formal paving;
(5) In the process of artificial lawn paving, 2cm~3cm should be overlapped between the lawn of each roll, so as to make the adjacent lawn overlap as closely as possible;
(6) Spread the 20cm~30cm wide belt along the lawn joint, put it under the lawn, and try to make the lawn joint in the central part of the connecting belt; then daub the lawn glue evenly with the scraper on the connecting belt and the lawn which need to bind; not repeated gluing, otherwise there will be
foaming phenomenon; when the glue produces adhesive force (usually 10 to 30 minutes after the glue, and hands touch nonstick is appropriate), cohere the lawn on both sides, and beat with a rubber hammer to make sure the combination of bond; one-time cement is required, and cannot move back and forth the adhered lawn.
(7) To ensure the bonding effect of two volumes of adjacent lawn, the adhesive shall form spot bonding between the joint and the base. Point bonding can not only save the glue, but also the suspension state of lawn is advantageous to drainage and releasing the displacement caused by thermal expansion and contraction in use; the artificial lawn and the base layer can be fixed with glue directly, and the
connecting belt is not necessary;
(8) After the basic splicing of the lawn, set each function line, point of the venue again; cut with a paper knife, then select the grass from a lot, put it in the jointing strip, scraping glue, put white grass back, bond and press with a rubber hammer, thus combining bond; it is difficult to draw arcs in narrow areas such as corner kicks. White lines can be cut into small pieces and spliced together;
(9)The construction of the environment temperature is over 5 DEG C; turf construction should
immediately stop work if encountered rain, snow and stormy weather, use tarpaulins to shelter the lawn, and ensure glue can be cured and the site is clean;
(10) After all the lawn has been bonded, begin to comb the lawn with the grass brushing machine;
(11) The curing time of the glue is usually three days, and the final strength is detected on the ten day. During curing, attention should be paid to the maintenance, avoiding exposure, immersion and
movement, so as to achieve the best bonding state.
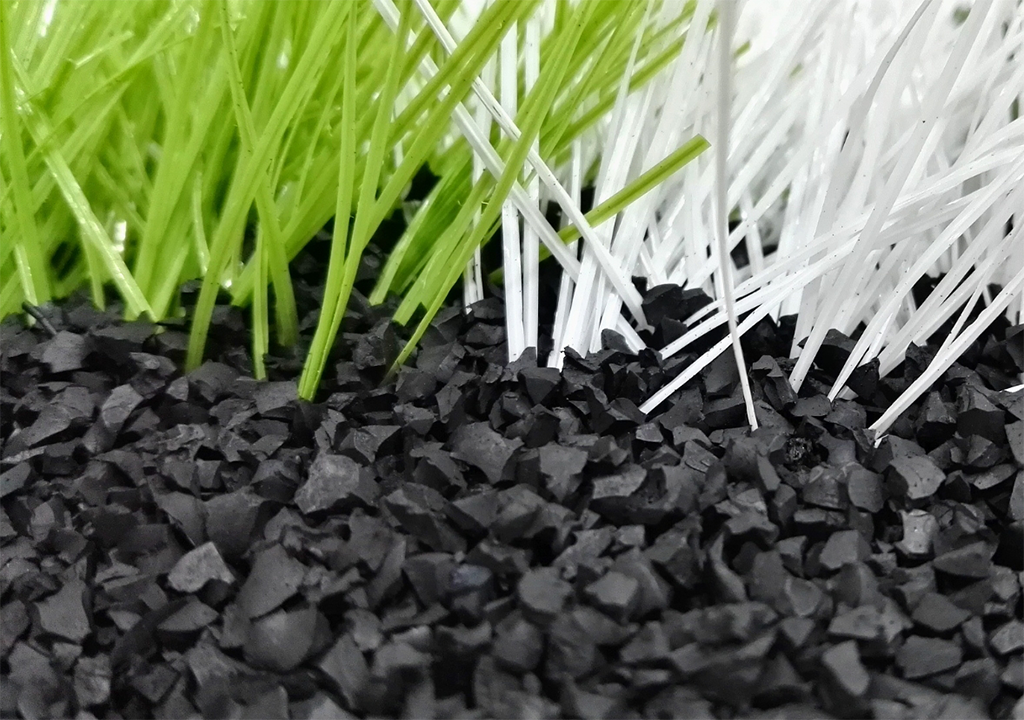
(4) Laying of quartz sand and elastic particles
(1) The lawn is completely paved, and after acceptance, lawn filling is started;
(2) The scouring and cleaning of the heavy rain will cause a small loss of the filler. The place to be filled can be sprinkled with quartz sand and rubber particles which are completely swept into the turf.
(5) Prohibitions
(1) Smoking, setting off firecrackers and welding are prohibited on the lawn;
(2) Quartz sand should be dry, clean and free from dust, and the filling amount of quartz sand is 25-28 kg / square meters; the sand filling of the whole site should be divided many times and sand filling should be uniform; it must be combed repeatedly with professional carding equipment from outside to inside, so that quartz sand can be filled to the root of the grass silk according to the requirements, and filled with dense to ensure that the grass silk is not buried by sand;
(3) After the pavement of the quartz sand, the comb machine should be used to comb all the grass
vertically and horizontally once, then the elastic particles can be laid;
(4) Laying of elastic particles is 6-8 kg / square meters, paving speed and pavement quantity should be uniform from outside to inside; after laying, it is necessary to check the smoothness and quantity of the elastic particles, and the insufficient places need to be filled according to the amount;
(5) After the filling of quartz sand and rubber particles, rubber particles are required to be about 15mm less than that of the straw;
(6) After the filling is completed, the lawn is combed vertically and horizontally with the combing
machine, so as to ensure that all the grass wires are combed.
(6) Acceptance of artificial lawn pavement
(1) Appearance
i.Artificial turf colors are uniform without color difference;
ii.The markings colors and sizes of various functional lines and dot lines should comply with the requirements of FIFA rules, and the error is not more than 2 centimeters;
iii.There is no obvious gap between the two lawn joints, and the bonding is compact;
iv.The surface of the filled sand and colloidal particles is clean and the filling is full, and the error range of the flatness of the site is not more than 1cm of the 3M ruler;
v.No phenomenon, such as arching, cracking or degumming, is allowed to occur on the ground.
(2) Thickness of excipients and fillers Artificial grass with grass height of 50mm needs the following accessories:
| Excipients category | Specifications(mm) | Height (mm) | Application amount(kg/m2)
|
| Quartz sand | 0.2-0.8 | 20-30 | 25-28 |
| Rubber particles | 0.8-2 | 8-12 | 6-8 |
| Glue | Special adhesive glue for lawn | / | 0.12-0.15 |
| Black Band | 200-300 ( the width ) | / | According to site conditions |
| Remark | The thickness of filled quartz sand and rubber particles is determined according to the height of the lawn, and the rubber particles are about 10-15mm lower than the straw. | ||
၎
င
၎
၎
၎
င
၎
၎
၎
င
၎
၎
၎
င
၎
၎
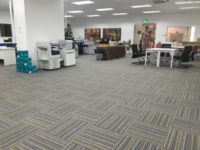
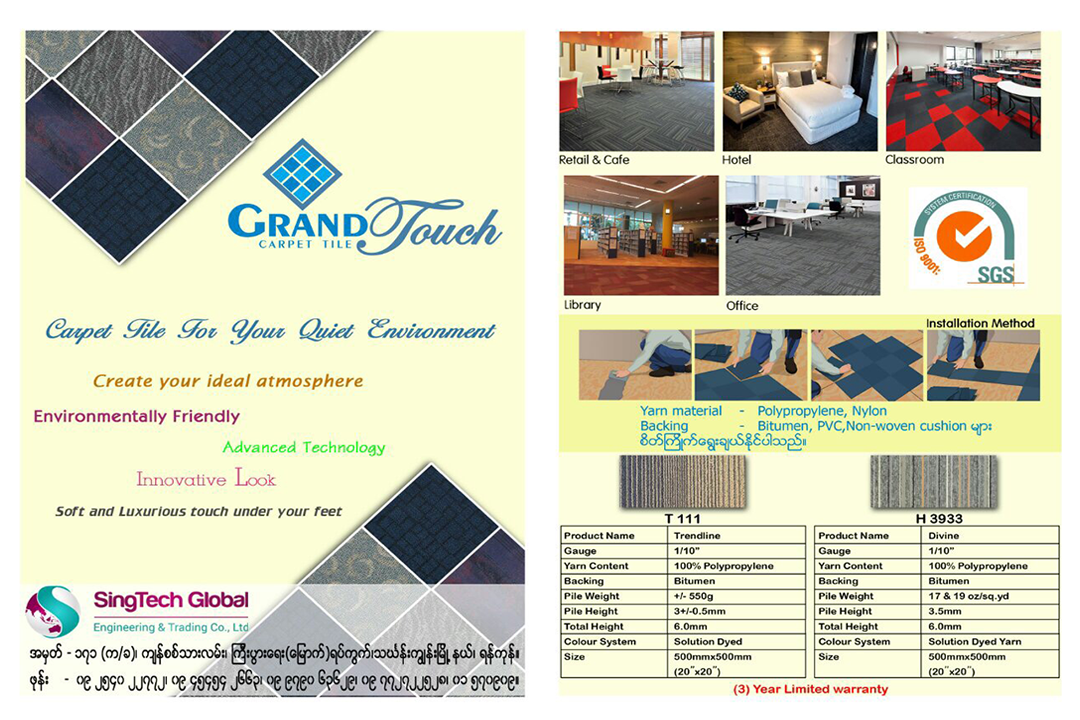
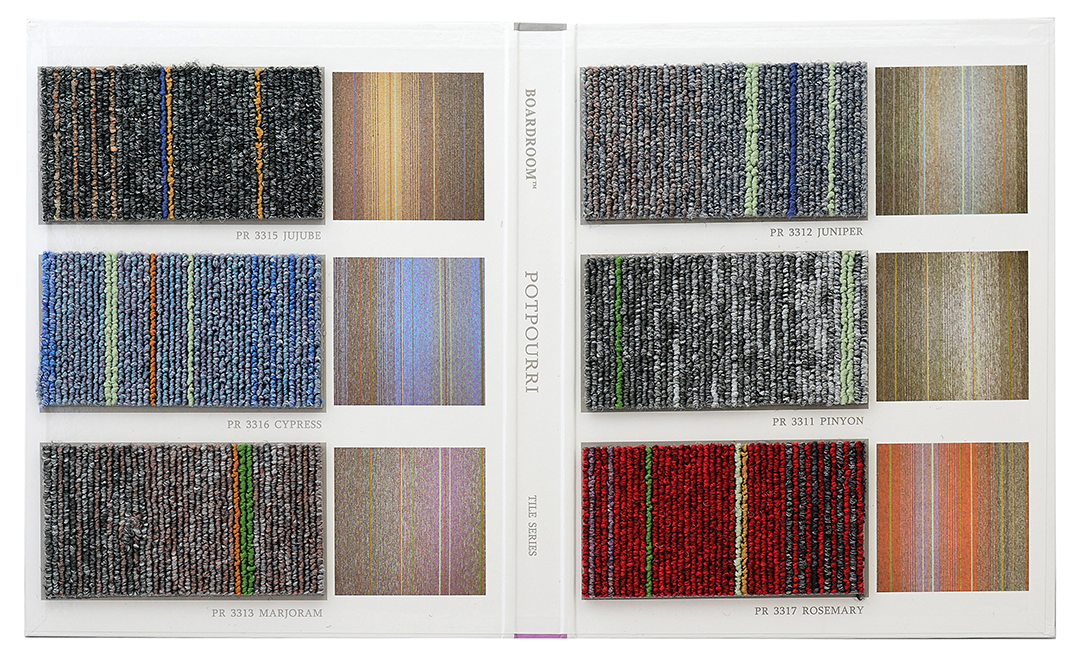
GrandTouch Carpet Tile


Installation & Maintenance
Installation Instructions of Grand Touch Carpet Tiles
Please read all instructions carefully before installation. Any variance from any of the following
instructions will become the responsibility of the installer and not the manufacturer, and shall void all otherwise applicable warranties.
Site Conditions
Grand Touch Carpet Tiles are not intended for installation on walls or wet surface. We recommend the following conditions before installation: The preferable temperature should be approximately 18-35 ℃ with a relative humidity of 15%-60%. And a pH range of 5-9 is satisfactory.
Floor Preparation
Carpet must be installed over properly prepared substrates. All cracks, holes, and flooring irregularities must be adequately repaired to ensure a smooth, finished appearance and prevent accelerated wear. The under floor or sub floor must be thoroughly even, dry, clean and solid. Remove any carpet staples or glue residue and make sure floor is clean for proper installation.
Check the Carpet before Installation
All Grand Touch Carpet Tiles should be inspected carefully for dye lot, pattern, quality and other damage during the shipping before installation. Contact with your dealer immediately when finding some defects. Do not install any product that has visible problems, otherwise that would void of the Product Warranty. The manufacturer will not be responsible for workmanship or problems due to improper installation. Carpet Tiles must be adequately protected from soil, dust, moisture and other contaminants and stored on a flat surface, however, the number should be no more than 5 cartons for a long period if overlapped.
Tools and Supplies
Scissors;Tape Measures; Strait Edge; Marking Pen; Vacuum Cleaner; Trowel; pH Test Paper; Calcium Chloride Moisture Test.
Adhesives
Any uneven surface that cannot be leveled may require adhesive or double sided tape to hold a tile in place. Recommend to use solvent environment-friendly glue.
Caution: To protect your hands always wear heavy work gloves when handing tackles strips and other tools and materials.
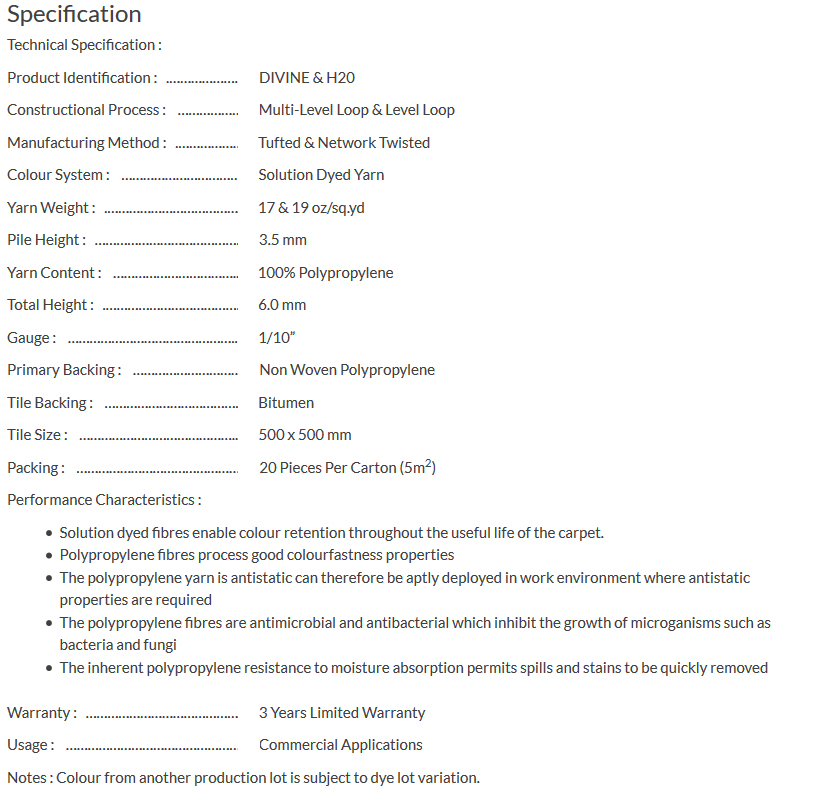
Cutting Carpet Tiles
Always cut tiles from the back. Using one tile as a reference tile, score a line on the back of the tile that is to be cut. Cut the tile along the reference line, being careful not to cut through the installed tile below it.
Always secure cut or partial tiles with releasable adhesive or double sided tape. The square of the cut carpet should not less than half of the square of common carpet tile. Otherwise it is not easy to secure it.
Floor Layout
Make a diagram with exact measurements of the areas where carpet will be installed. It is wise to locate the seams in the areas of lightest traffic. Indicate all windows, doors, furniture and unusual angles. Divide the room into four quadrants and snap a chalk line. Make sure quadrants meet at right angles. Use the 3-4-5 triangle method to make sure the first line is perpendicular to the second line. Check the distance from each centerline to its parallel wall and determine how many tiles will be required.
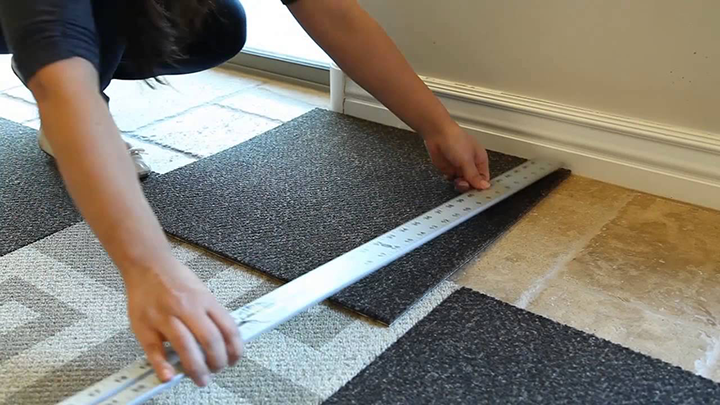
Carpet Installation
Tiles are printed on the back with arrows showing pile direction. Start from the intersection point in the center of the floor. Install the tiles in one quadrant using the chalk lines as guidelines. Fill in the area between the two chalk lines using the stair step method. Continue to install tiles in a stair step or pyramid pattern, starting at the center point. Check to make sure the tiles are properly aligned at edges during the installation. Fit the tiles tightly together by sliding them together and press into the adhesive. Repair after Carpet Tile’s Installation
Check the whole effect after the installation, if there are any seams among tiles, change them if possible.
As for the fluff, use the scissors to repair accordingly.
၎
င
၎
၎
၎
င
၎
၎
၎
င
၎
၎
၎
င
၎
၎
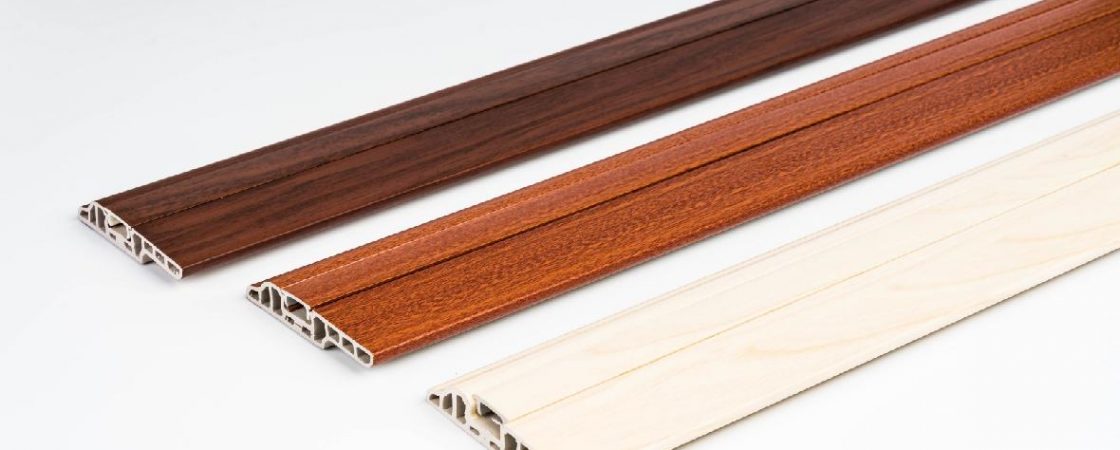
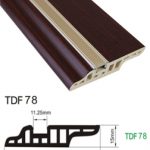
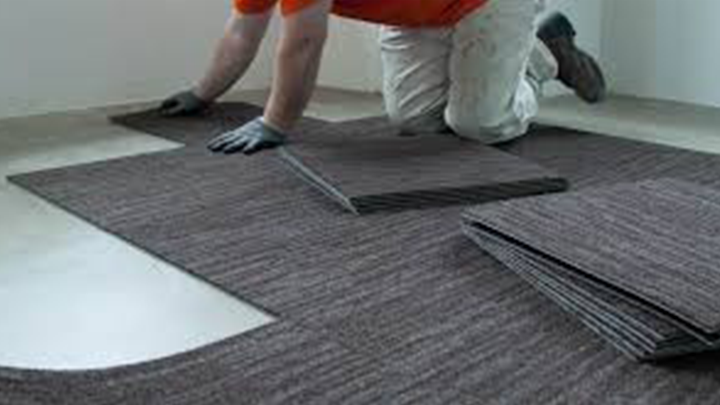
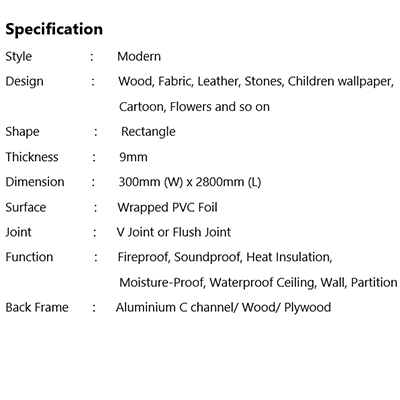
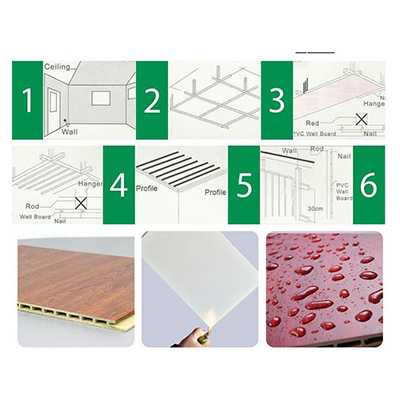
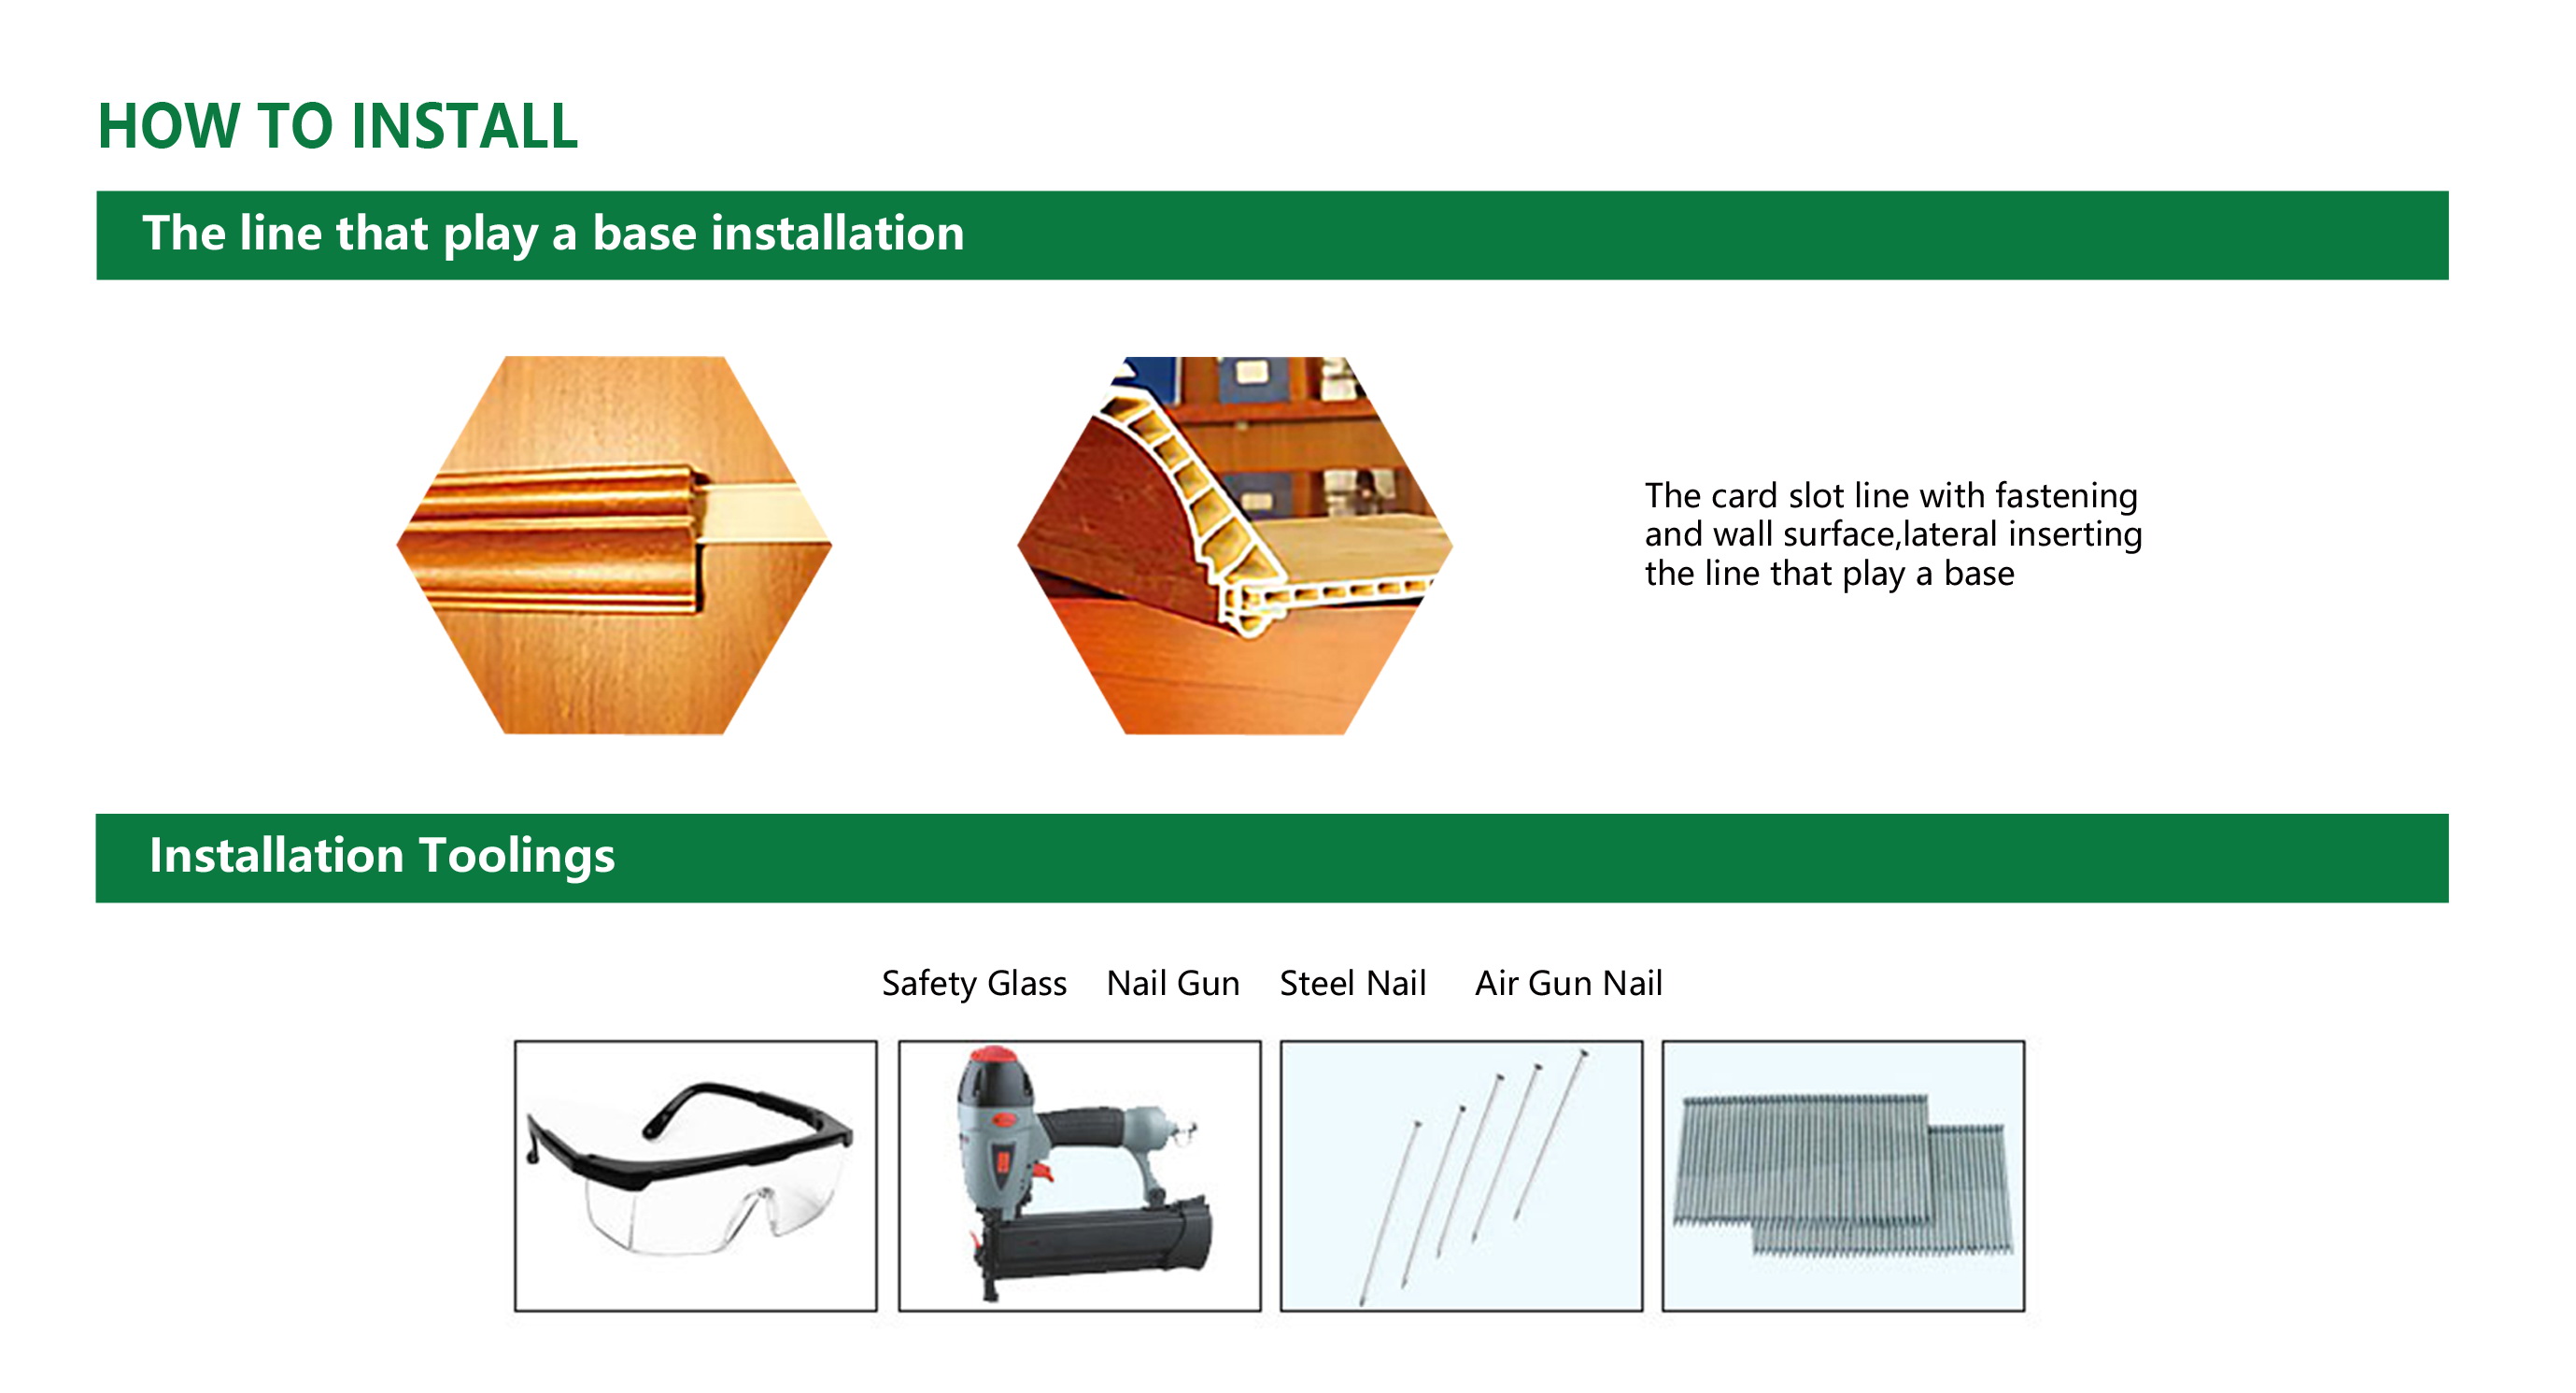
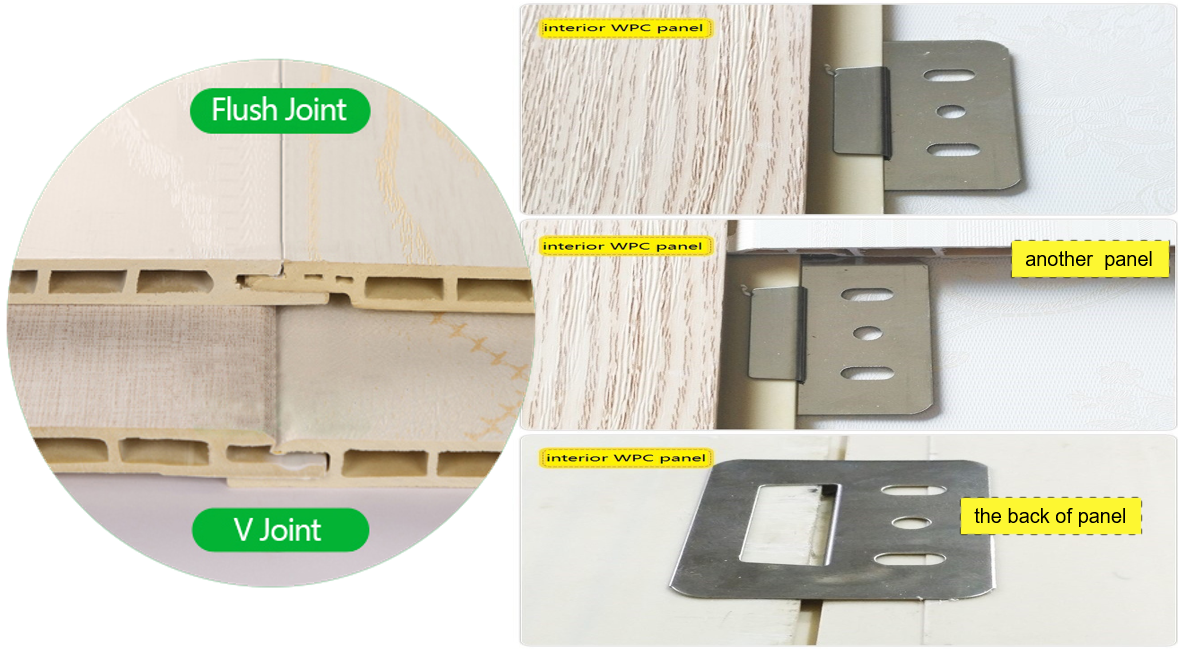
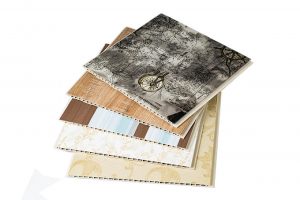
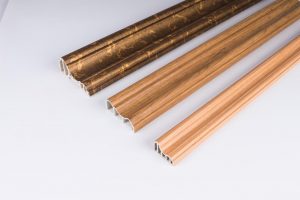
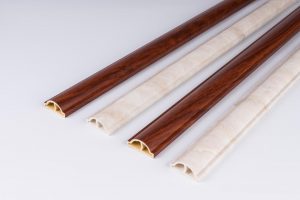
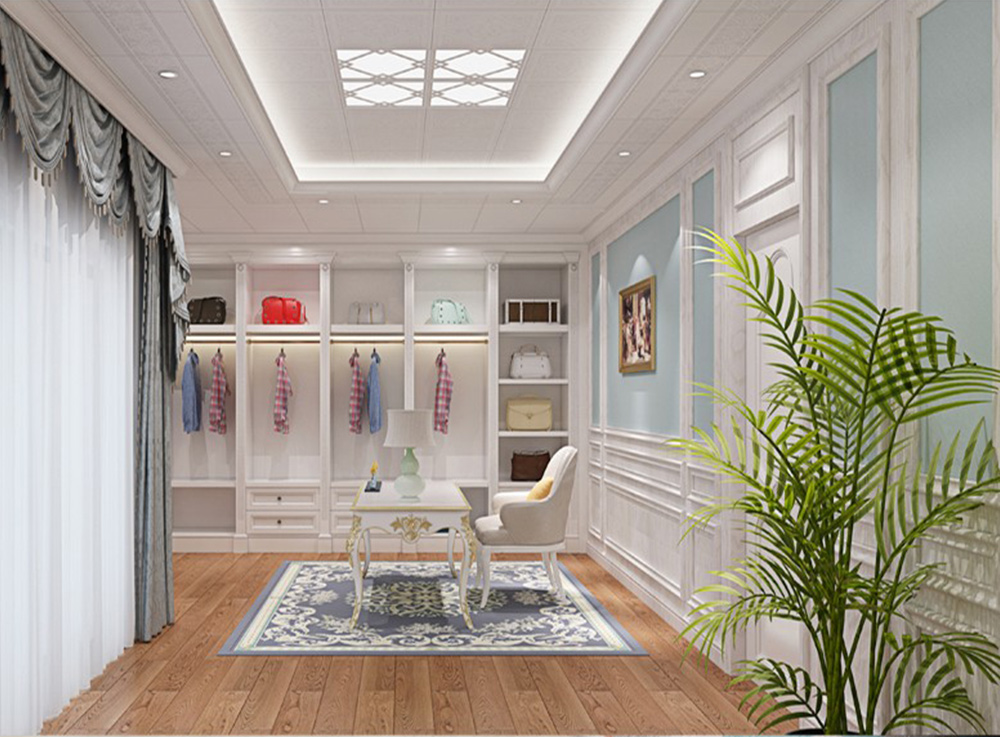
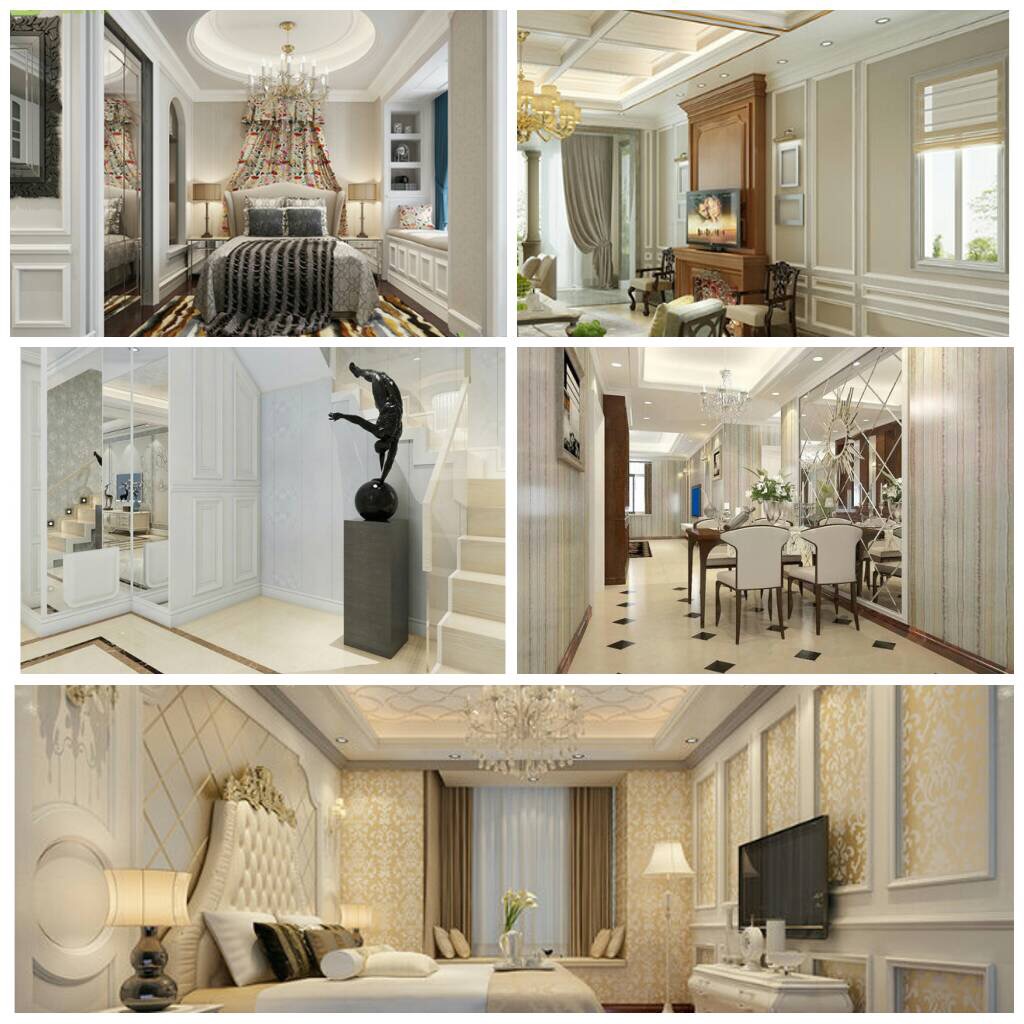
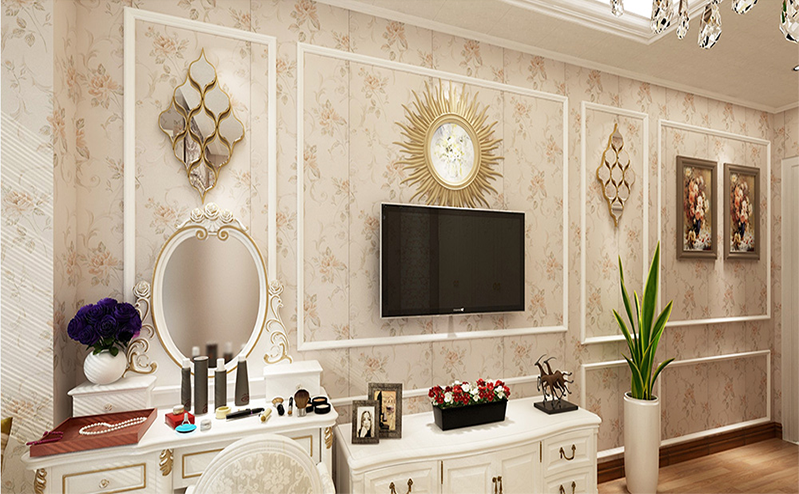
Wall Decorated Panel
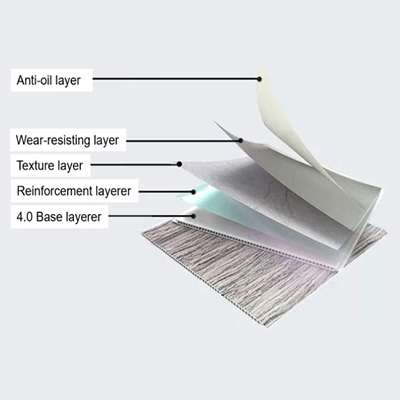
Advantage of Wall Decorated Panel
- No formaldehyde(E0), benzene and other decorative pollution.
- FireProof(B1),cold and heat resistance, anti-aging.
- Available for nailing, drilling, sawing with good wood properties.
- Waterproof, moisture proof, can be cleaned by water.
- Anti-corrosive, insect-resistant, antibacterial , acid&alkaii resistance.
- With high strength, good toughness, no deformation, no cracking.
- Cold and heat resistance, anti-aging, fire extinguishing.
- Durable with life span of more than 30 years.

- လူကြီးမင်းတို့ရဲ့အိမ်၊ ရုံးခန်း၊ Site ရှိရာ နေရာများသို့လာရောက် ဆွေးနွေးအကြံဉာဏ်များပေးခြင်း၊ တိုင်းတာခြင်း၊ Topping များ၊ Sub-base level များ စစ်ဆေးခြင်းများကို အခမဲ့ဆောင်ရွက်ပေးခြင်း
- Floor နမူနာများ လာရောက်ပြသပေးခြင်း၊
- ရှိပြီးသား ကျွန်းပါကေးများ ၊ Laminate (ကိုရီးယားပါကေး)များ ပျက်စီးနေပါက ပြန်လည်ခွာပြီး စွန့်ပစ်ခြင်း ဝန်ဆောင်မှုများပေးခြင်း
- လိုအပ်ပါက Leveling compound များဖြင့် Topping Level ညှိပေးခြင်း
- လိုအပ်ပါက Topping (Sand+Cement) ပြန်လောင်းပေးခြင်း
- ကျွမ်းကျင်သော Installer များဖြင့် လက်ရာသေသပ်စွာ စိတ်တိုင်းကျသည်အထိ ခင်းကျင်းဝန်ဆောင်မှုပေးခြင်း
- ခင်းကျင်းပြီးနောက်ပိုင်း ကြမ်းခင်းအား အသုံးပြုစဉ် မှန်ကန်သော သန့်ရှင်းထိန်းသိမ်းမှုနည်းစံနစ်များ ပြုလုပ်နိုင်ရန် ရှင်းလင်းပြောပြပေးခြင်း
- နယ်မြို့များသို့လည်း ပို့ဆောင်ပေးခြင်း၊ လိုက်လံ၍ ခင်းကျင်း ဝန်ဆောင်မှု ပေးခြင်း